Appearance
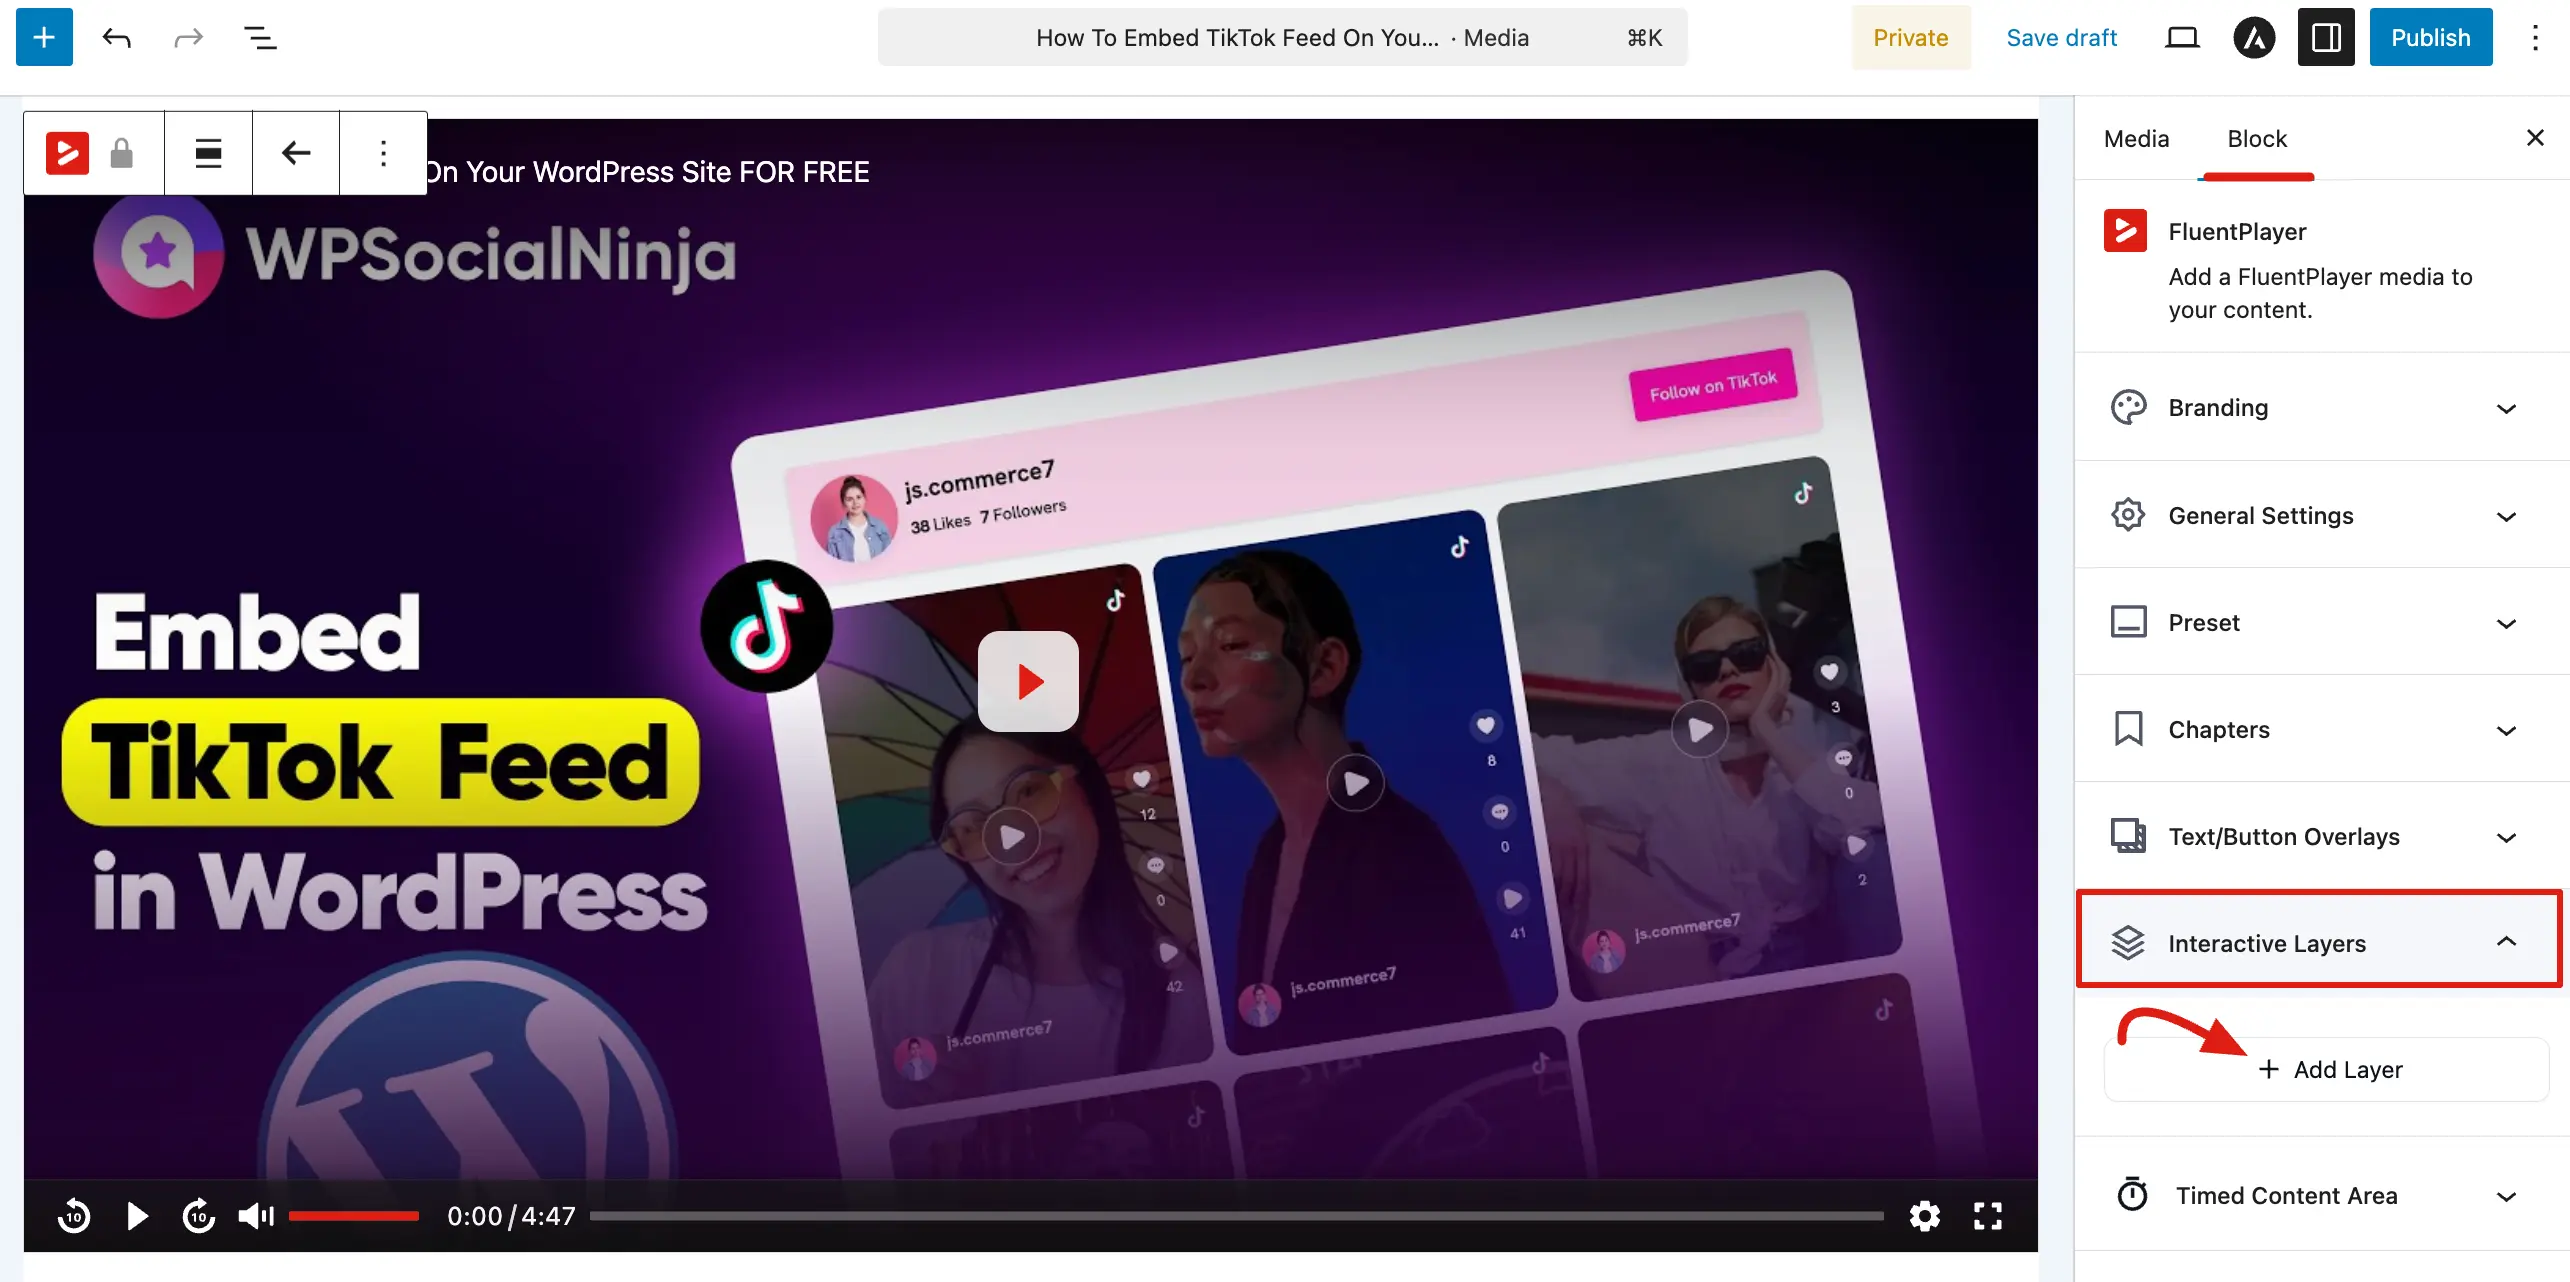
Interactive Layers (Block sidebar)
Interactive Layers are timed elements that sit on top of your video to drive engagement. Unlike simple text overlays, these layers allow viewers to interact with your content through forms, clickable hotspots, and calls to action (CTAs).
To manage your layers, select the FluentPlayer block and open the Interactive Layers panel in the Block tab.
Managing Your Layers
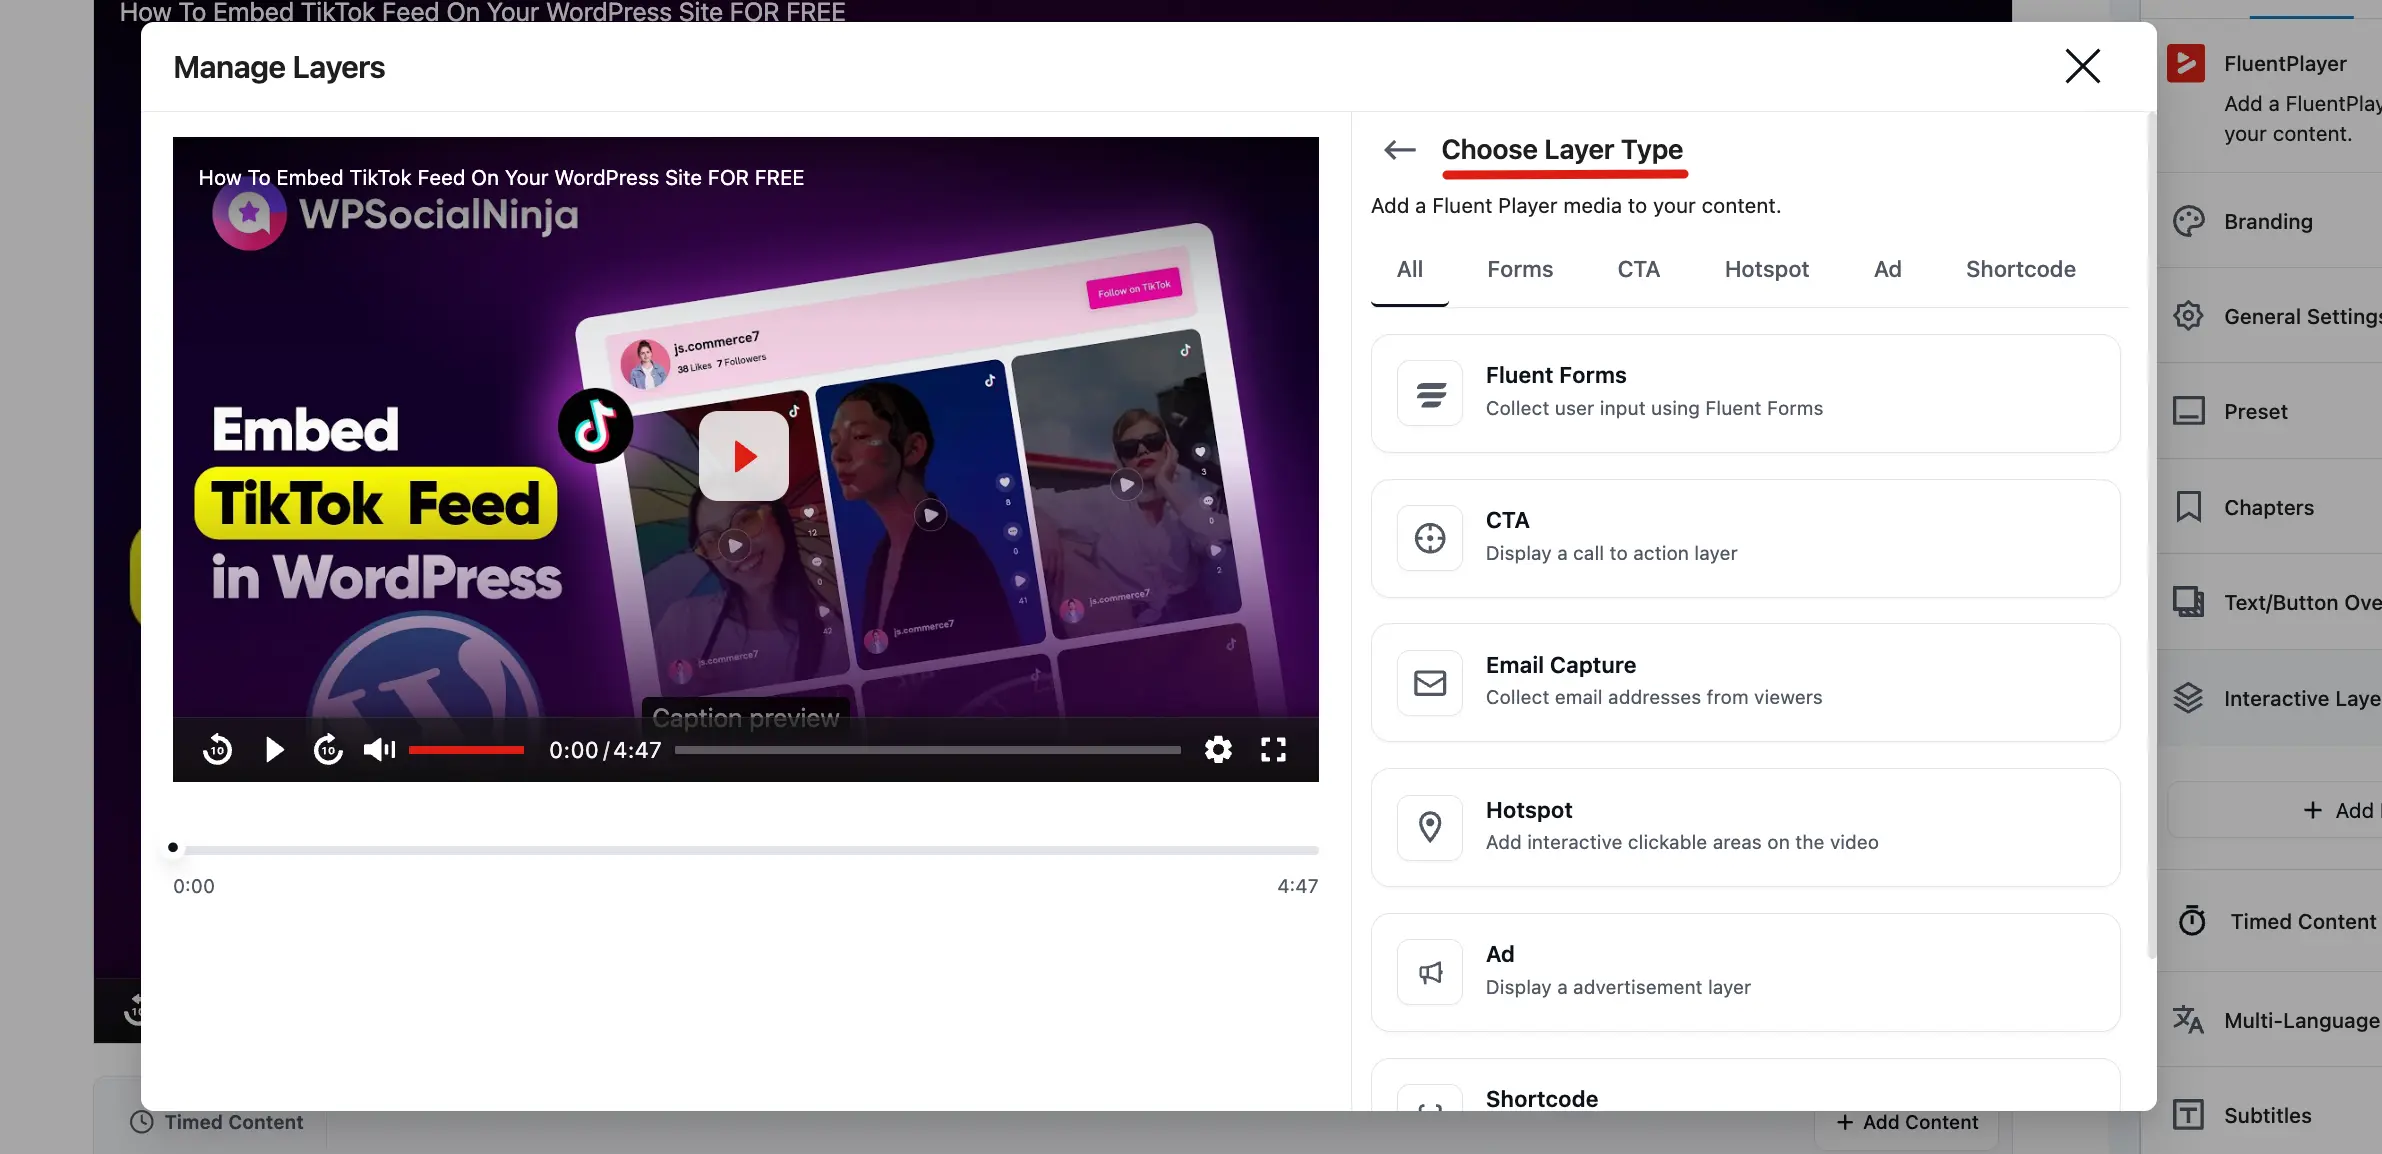
Click the + Add Layer button to open the Manage Layers window. From here, you can browse available layers using the following filters:
- All: Shows every available layer type.
- Forms: Displays form related layers, such as Fluent Forms.
- CTA: Filters for Call to Action layers designed to drive clicks.
- Email Capture: Collects email addresses from viewers.
- Hotspot: Shows options for creating interactive regions on the video.
- Ad: Displays available Ad placement layers.
- Shortcode: Filters for layers that can render any WordPress Shortcode.
Layer Types and Features
Each layer type serves a specific marketing or educational purpose:
- Fluent Forms (Free): Embed a complete Fluent Forms form at a specific time in the video. You can choose your form from a dropdown, set its position, and even adjust its width and height percentage.
- Email Capture (Free): Collect viewer emails directly within the player. These connect to your configured Email Providers like FluentCRM or Mailchimp.
- Call to Action (CTA) (Pro): Create a prominent overlay to prompt an action. You can design the content using a rich text editor and set whether it pauses the video until the viewer clicks.
- Hotspot (Pro): Add clickable icons or dots to the video. You can customize the icon, add a tooltip, and set a target URL for when the viewer clicks the hotspot.
- Ad (Pro): Place a timed advertisement over your video. You can upload an image, set a "Skip" timer, and customize the color of the skip progress bar.
- Shortcode (Pro): Display the output of any WordPress shortcode as a layer. This is highly flexible for adding custom content from other plugins.
Free vs Pro
Only the Fluent Forms and Email Capture layers are available in the free plugin. The CTA, Hotspot, Ad, and Shortcode layers require FluentPlayer Pro.
Configuration and Advanced Rules
Every layer includes standard controls to ensure it appears exactly when and where you want it:
- Timing: Set the precise Start Time (Hours, Minutes, Seconds) and Duration for each layer.
- Layout & Positioning: Use the visual position grid to snap your layer to regions like Top Left, Center, or Bottom Right. You can also adjust Form Width (%) and Form Height (%) for form layers.
- Appearance: Customize Background and Text colors to match your brand.
- Controls (Skip): Toggle Allow Skip so viewers can close the layer to continue watching.
- Conditions (Advanced): You can set rules for when a layer appears based on viewer data.

Advanced Conditions
The Conditions section in FluentPlayer allows you to transform static video overlays into smart, dynamic elements. By setting specific rules, you can control exactly who sees a layer based on their login status, CRM data, or even their behavior on your site.
Setting Up Visibility Rules
You can add multiple rules to a single layer and decide how they interact:
- Any: The layer will show if at least one of your conditions is met.
- All: The layer will only show if every single condition is met.
Available Condition Fields
FluentPlayer provides several deep integration fields to target your audience precisely:
- Viewer is Logged In: Choose to show or hide the layer depending on whether the user is currently signed into your WordPress site.
- Viewer is CRM Contact: Target users based on their status in your connected CRM (like FluentCRM). You can set this to "True" or "False".
- Viewer has CRM Tag: Show the layer only to contacts who have (or do not have) specific tags, allowing for highly personalized marketing.
- Viewer is in CRM List: Trigger layers specifically for members of certain email lists or segments.
- Viewer has submitted their email: Show or hide the layer based on whether this viewer has already submitted their email through a capture form. Unlike the client-side rules below, this is evaluated server-side, so it holds even if the viewer returns later or on another page. Use it to stop asking known leads for their email again.
- Layer has been submitted: This prevents a viewer from seeing the same form or CTA again if they have already interacted with it.
- URL Query Parameter: A powerful tool for marketers. You can show a layer only if the visitor arrived via a specific URL (e.g., yoursite.com/video?source=facebook).
- This layer has been seen: Set the layer to disappear permanently once a user has viewed it once.

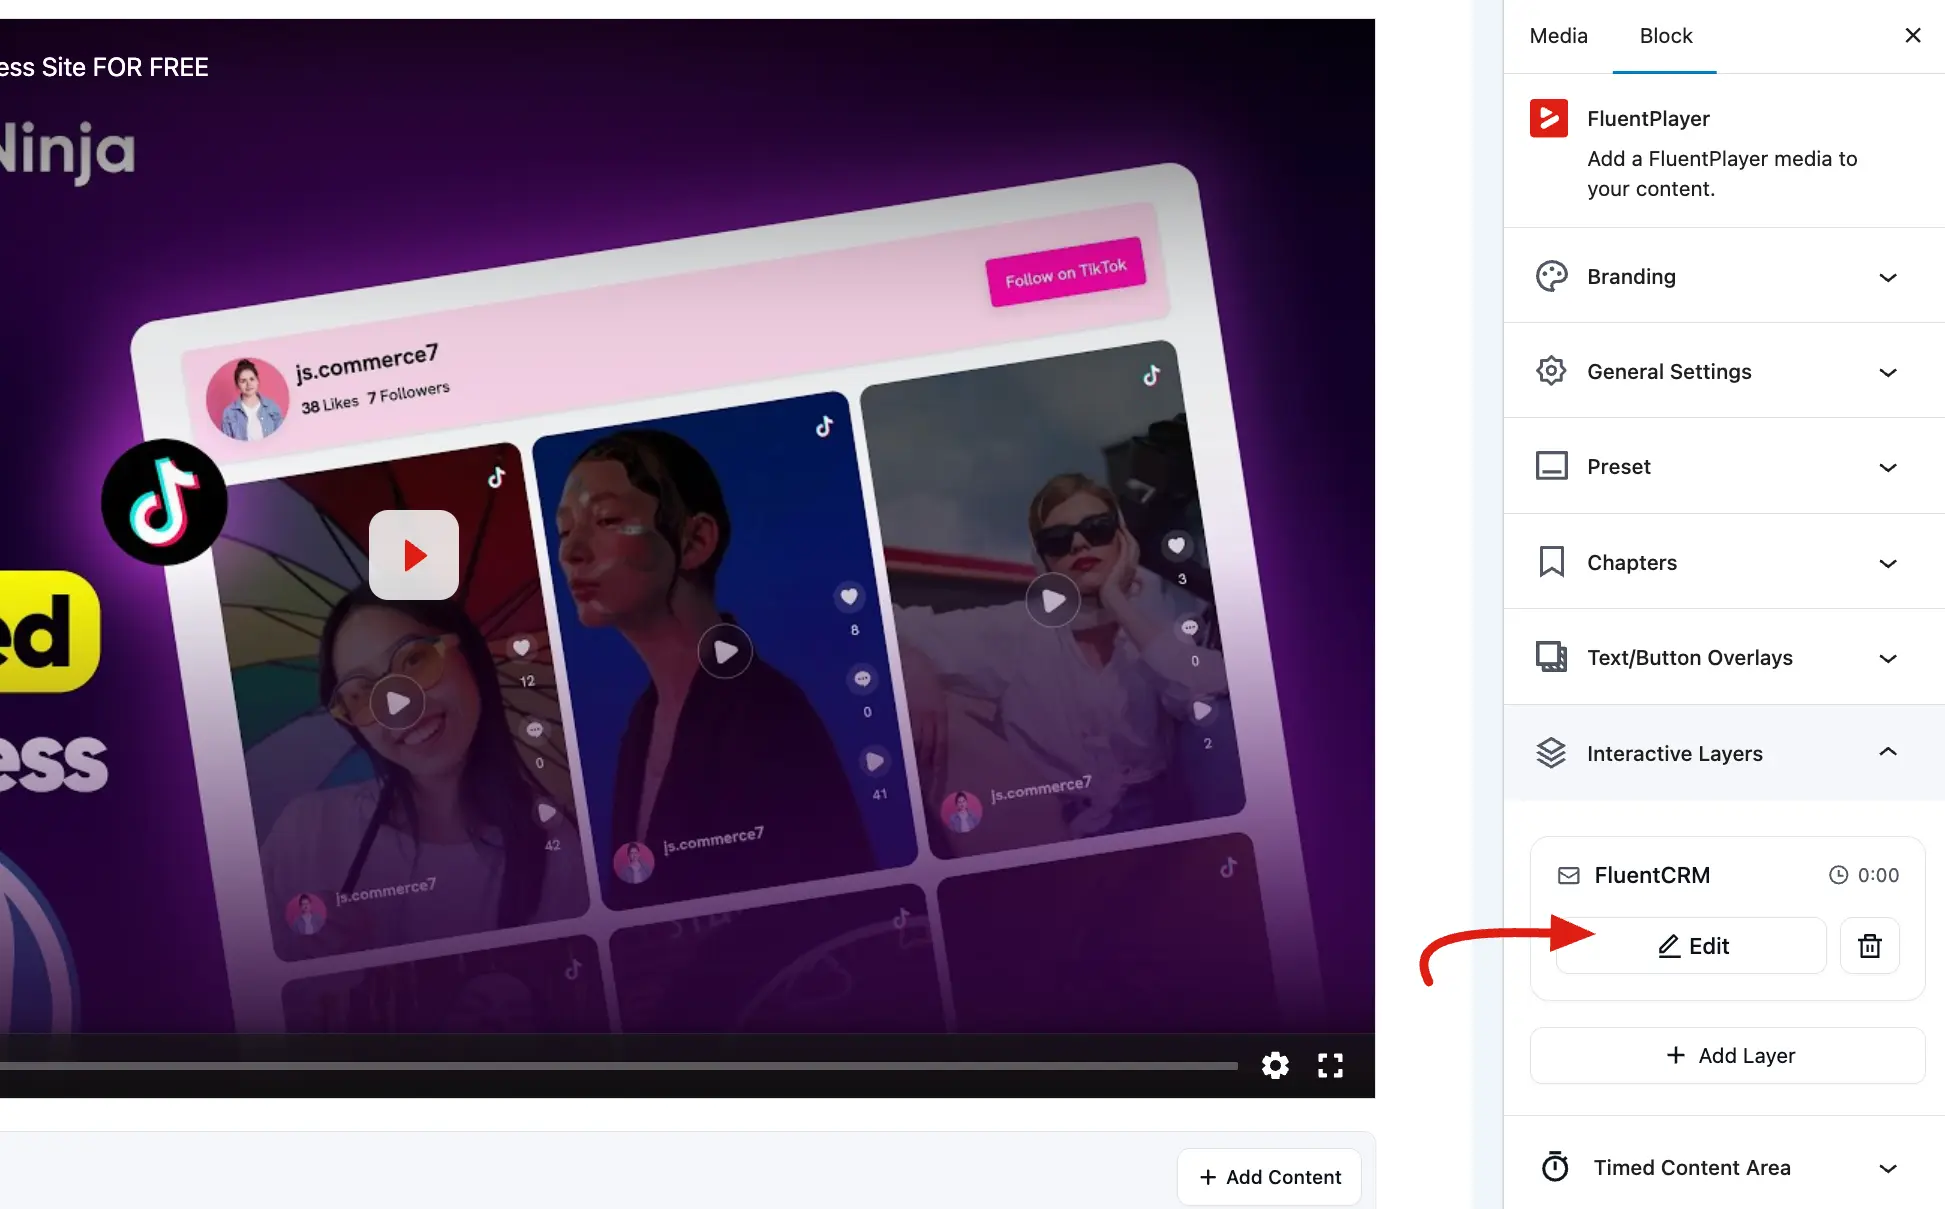
Managing Existing Layers
Once you have added a layer, it will appear in a list within the sidebar panel.
- Edit: Click the Edit (Pencil) icon to reopen the configuration window and make changes.
- Delete: Click the Trash icon to remove a layer from your video.
TIP
Always test your layers on a mobile device. Small targets like Hotspots can be difficult to tap on a smartphone screen, so ensure they are large enough for a good user experience.
Interactive Layers turn your videos into powerful conversion tools. By carefully timing forms, CTAs, and hotspots, you can guide your viewers toward taking the next step whether that's signing up for a newsletter or clicking a product link at the exact moment they are most engaged.