Appearance
FluentCommunity
The FluentPlayer integration allows you to transform your FluentCommunity portal into a fully branded, professional, and video-enabled experience. Instead of relying on the default look of third-party embeds, FluentPlayer ensures all video content from community posts to course lessons is consistent and perfectly matches your community’s style.
What you need
- FluentPlayer installed and activated.
- FluentCommunity installed and your portal/community configured.
- Media items created in FluentPlayer → Media (or connected sources such as Mux or Bunny Stream).
Free integration
The FluentCommunity integration is free — it activates automatically once FluentCommunity is installed, and the features on this page (member uploads, unified branding, document attachments, and Smartcodes) work on the free plugin. The only Pro-gated part is embedding a FluentPlayer Playlist inside a lesson, because Playlists is a separate Pro feature.
Core Integration Features
- Member Video Uploads: Allow members to upload videos directly to community Spaces in formats like MP4, M3U8, and MOV.
- Unified Branding: Force external links (YouTube, Vimeo, HLS) to render with your custom FluentPlayer design and brand colors.
- Lesson Resources: Attach downloadable files (PDFs, worksheets) directly to your video lessons.
- Smartcodes: Personalize lesson content using tags like
{{user.display_name}}to greet students individually.
Step by Step Configuration
1. Enabling the Integration
If you do not have FluentPlayer installed, you can do so directly from your portal:
- Go to FluentCommunity > Settings > Features & Addons.
- Find the FluentPlayer module under Recommended Plugins and click Install FluentPlayer.
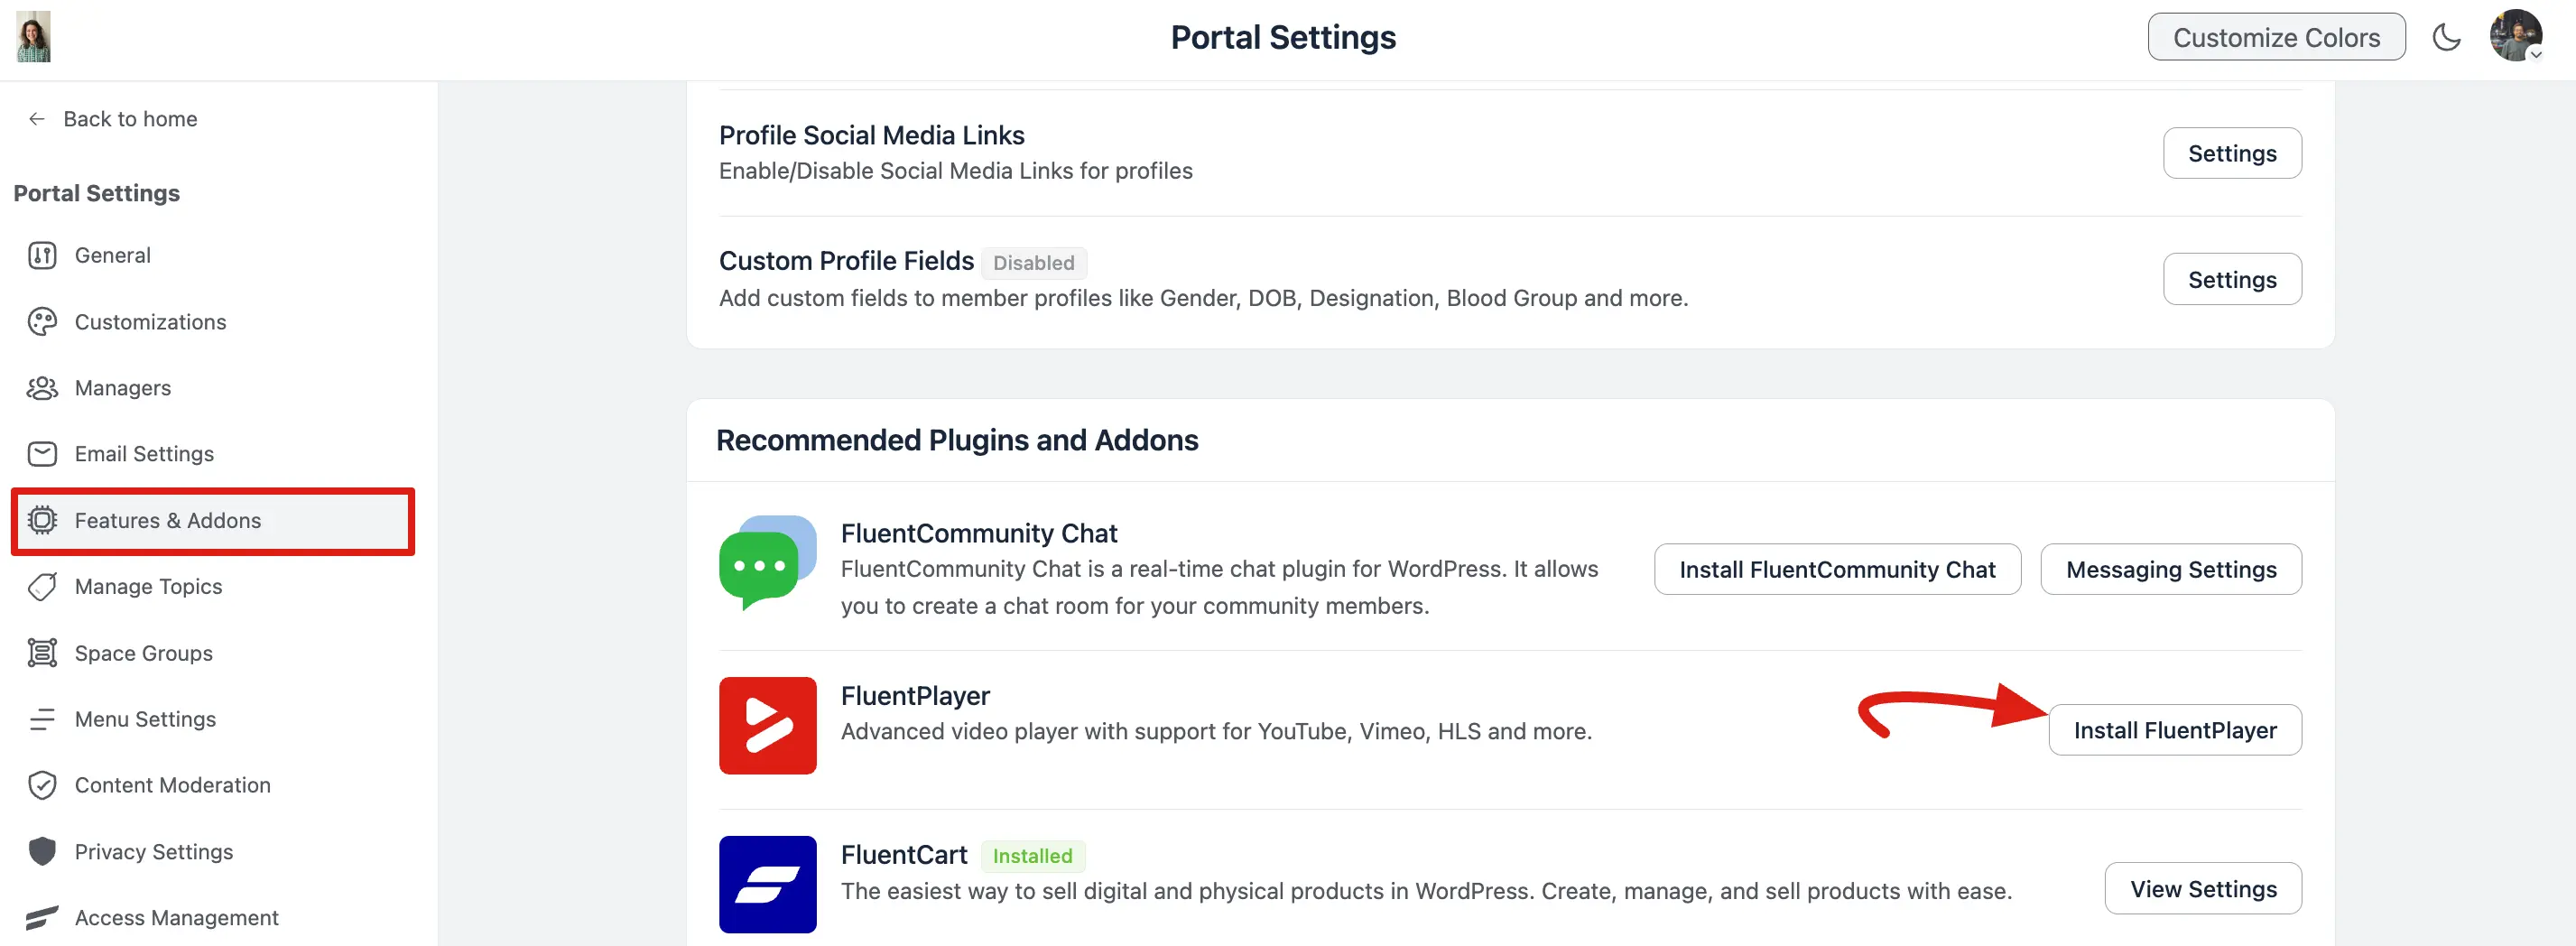
- Once installed, click the Player Settings button on the FluentPlayer module to open the configuration panel.
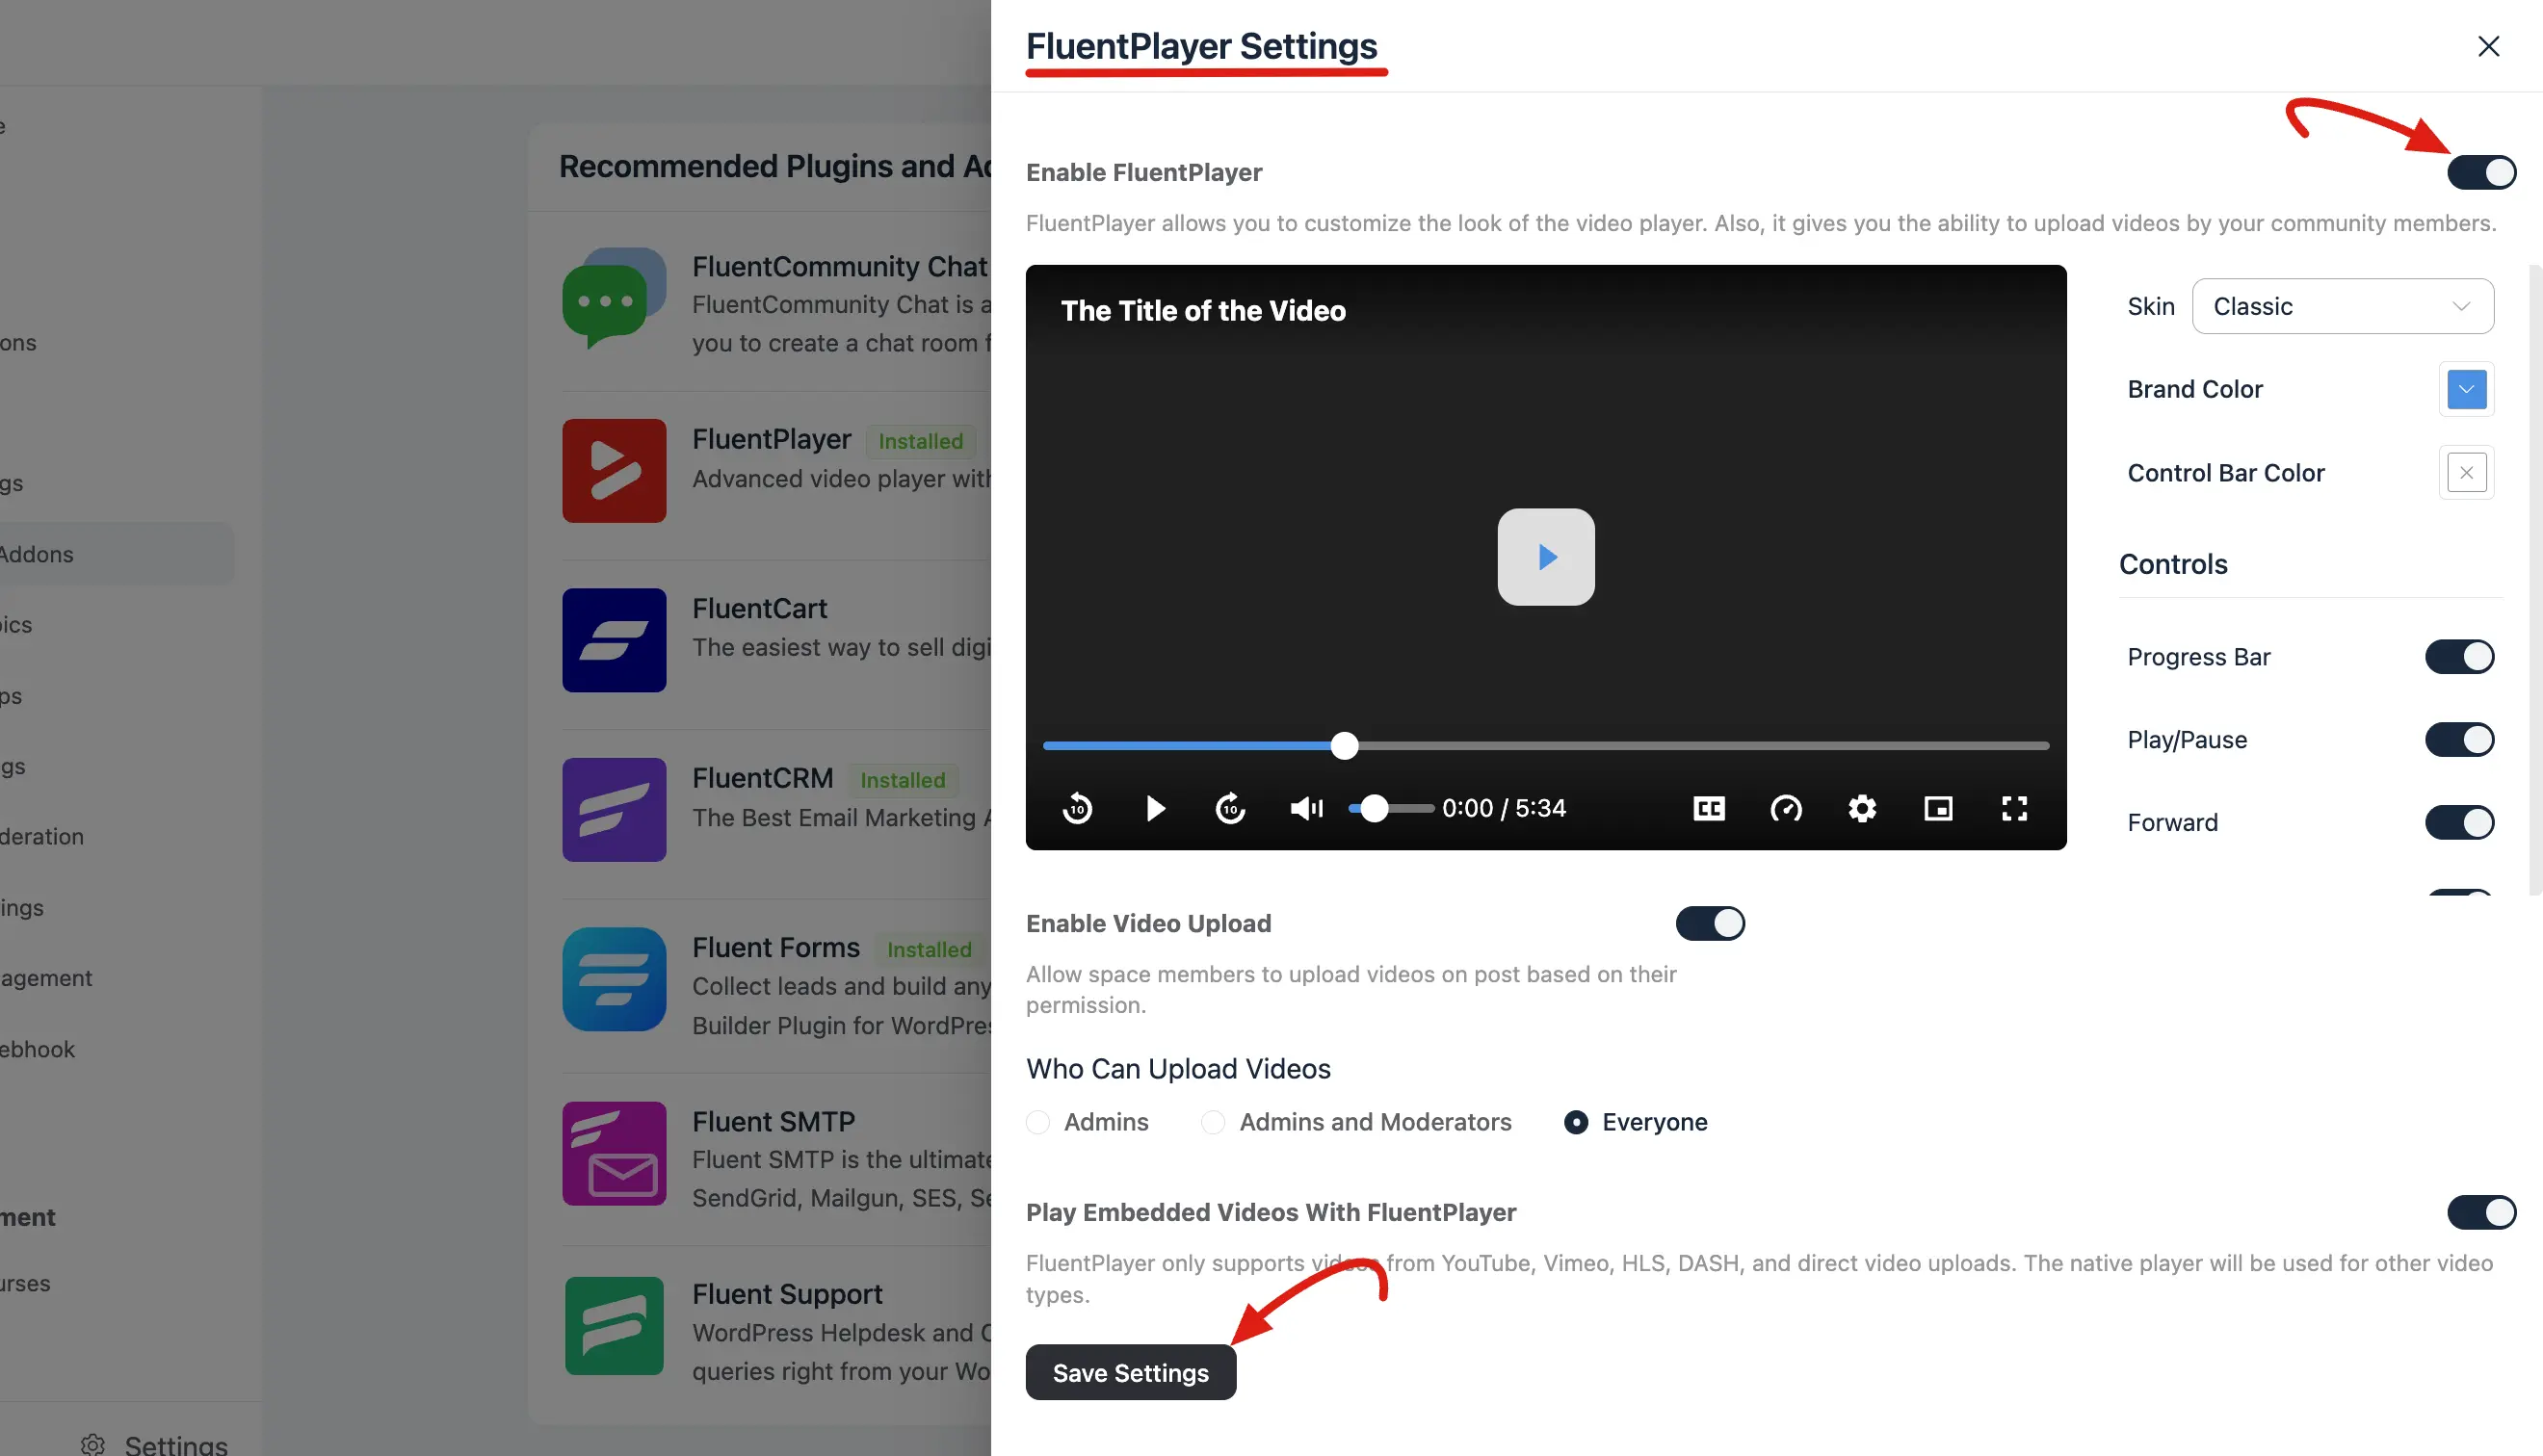
- Toggle Enable FluentPlayer to ON.
2. Customizing Appearance and Behaviors
In the Player Settings slide in panel, you can fine tune how videos look and act:
- Select Player Skin: Choose from layouts like Modern, Classic, Simple, Floating, or Minimal.
- Set Brand Color: Define a primary hex color for the progress bar and active controls.
- Toggle Controls: Enable or disable specific buttons like Volume, Fullscreen, Picture in Picture, or the Captions Toggle.
- Set Behaviors: Configure Muted Autoplay for feed environments or Save Play Position so members can resume videos exactly where they left off.
3. Managing Video Uploads & Embeds
Control how your community members interact with video content:
- Enable Video Uploads: Turn this toggle ON to allow direct file uploads in community posts.
- Permissions: Restrict who can upload videos choose from Admins, Admins and Moderators, or Everyone.
- Play Embedded Videos With FluentPlayer: Turn this ON to force external links (like YouTube or Vimeo) to use your custom branded player.
How to Add Videos to Community Posts or Spaces
Once permissions are configured, members can easily share video content within the community feed:
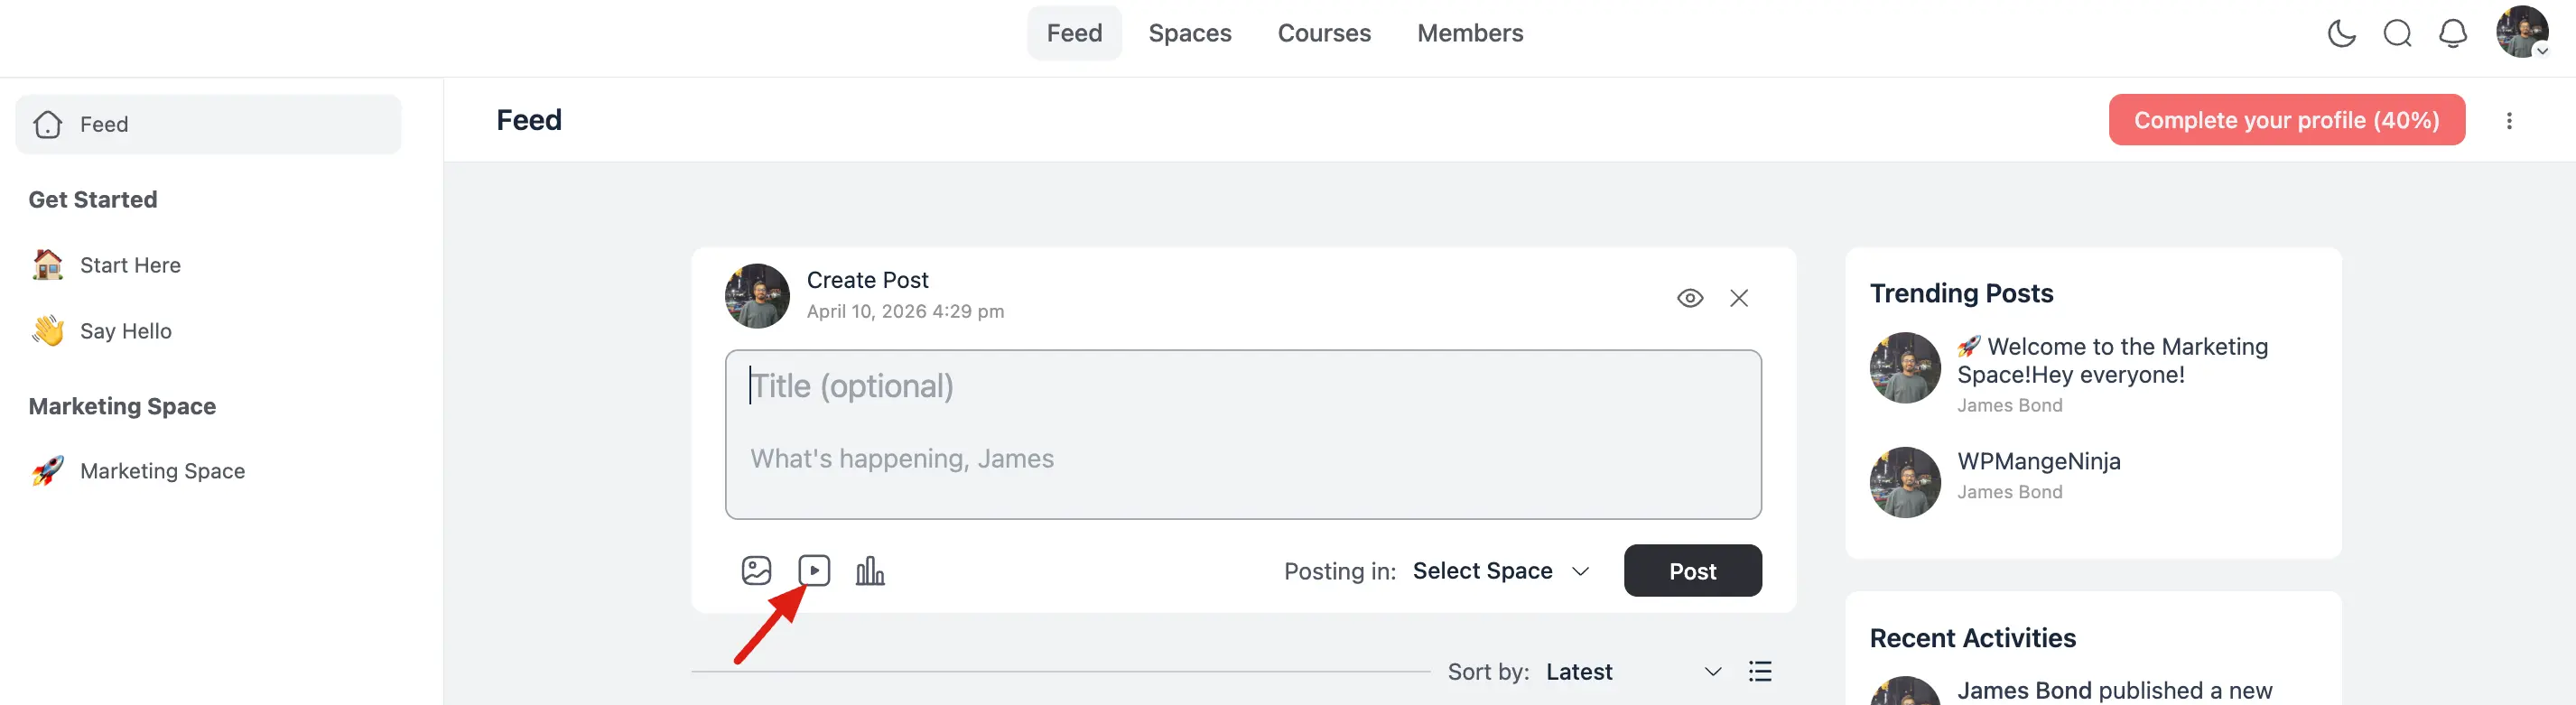
- Navigate to the community Feed or a specific Space.
- Click the "What's happening?" box to create a new post.
- Click the Video Icon in the post toolbar.
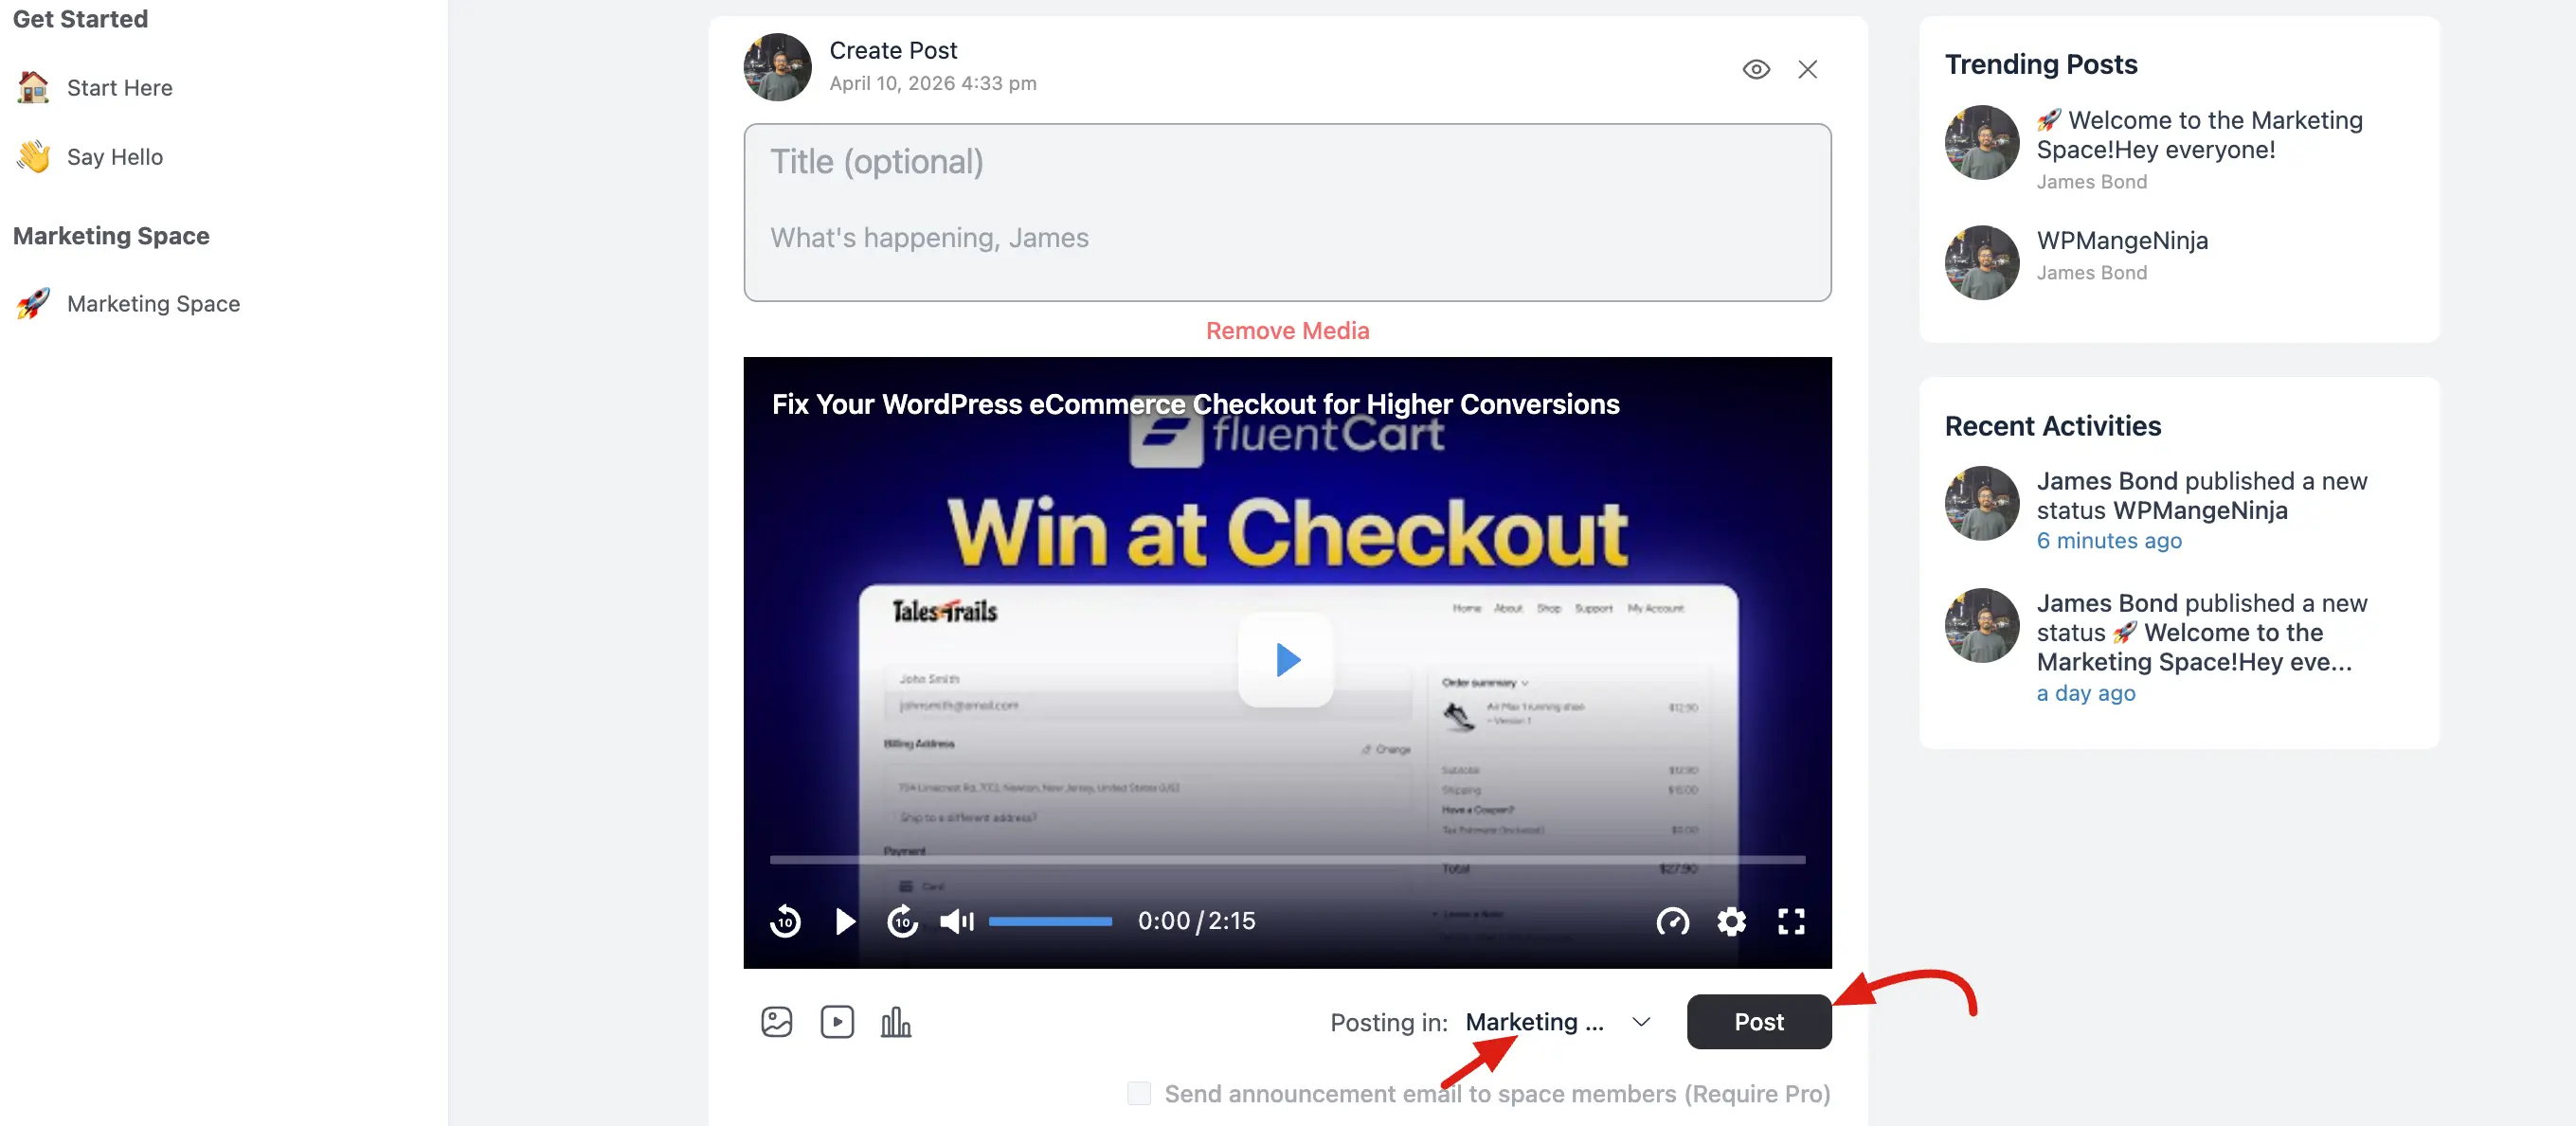
Choose your source in the Attach Video popup:
- Oembed: Paste a simple URL (e.g., from YouTube or Vimeo).
- HTML Code: Paste an iframe or custom embed code.
- Upload Video: Drag and drop or select a video file from your device.
Click Embed or Upload.
Select your target Space and click Post.
How to Add Video Lessons to Courses
For course creators, FluentPlayer integrates directly into the lesson editor using the Gutenberg block system:
1. Adding the Player Block
Open your lesson editor and click the (+) icon to search for the FluentPlayer block.
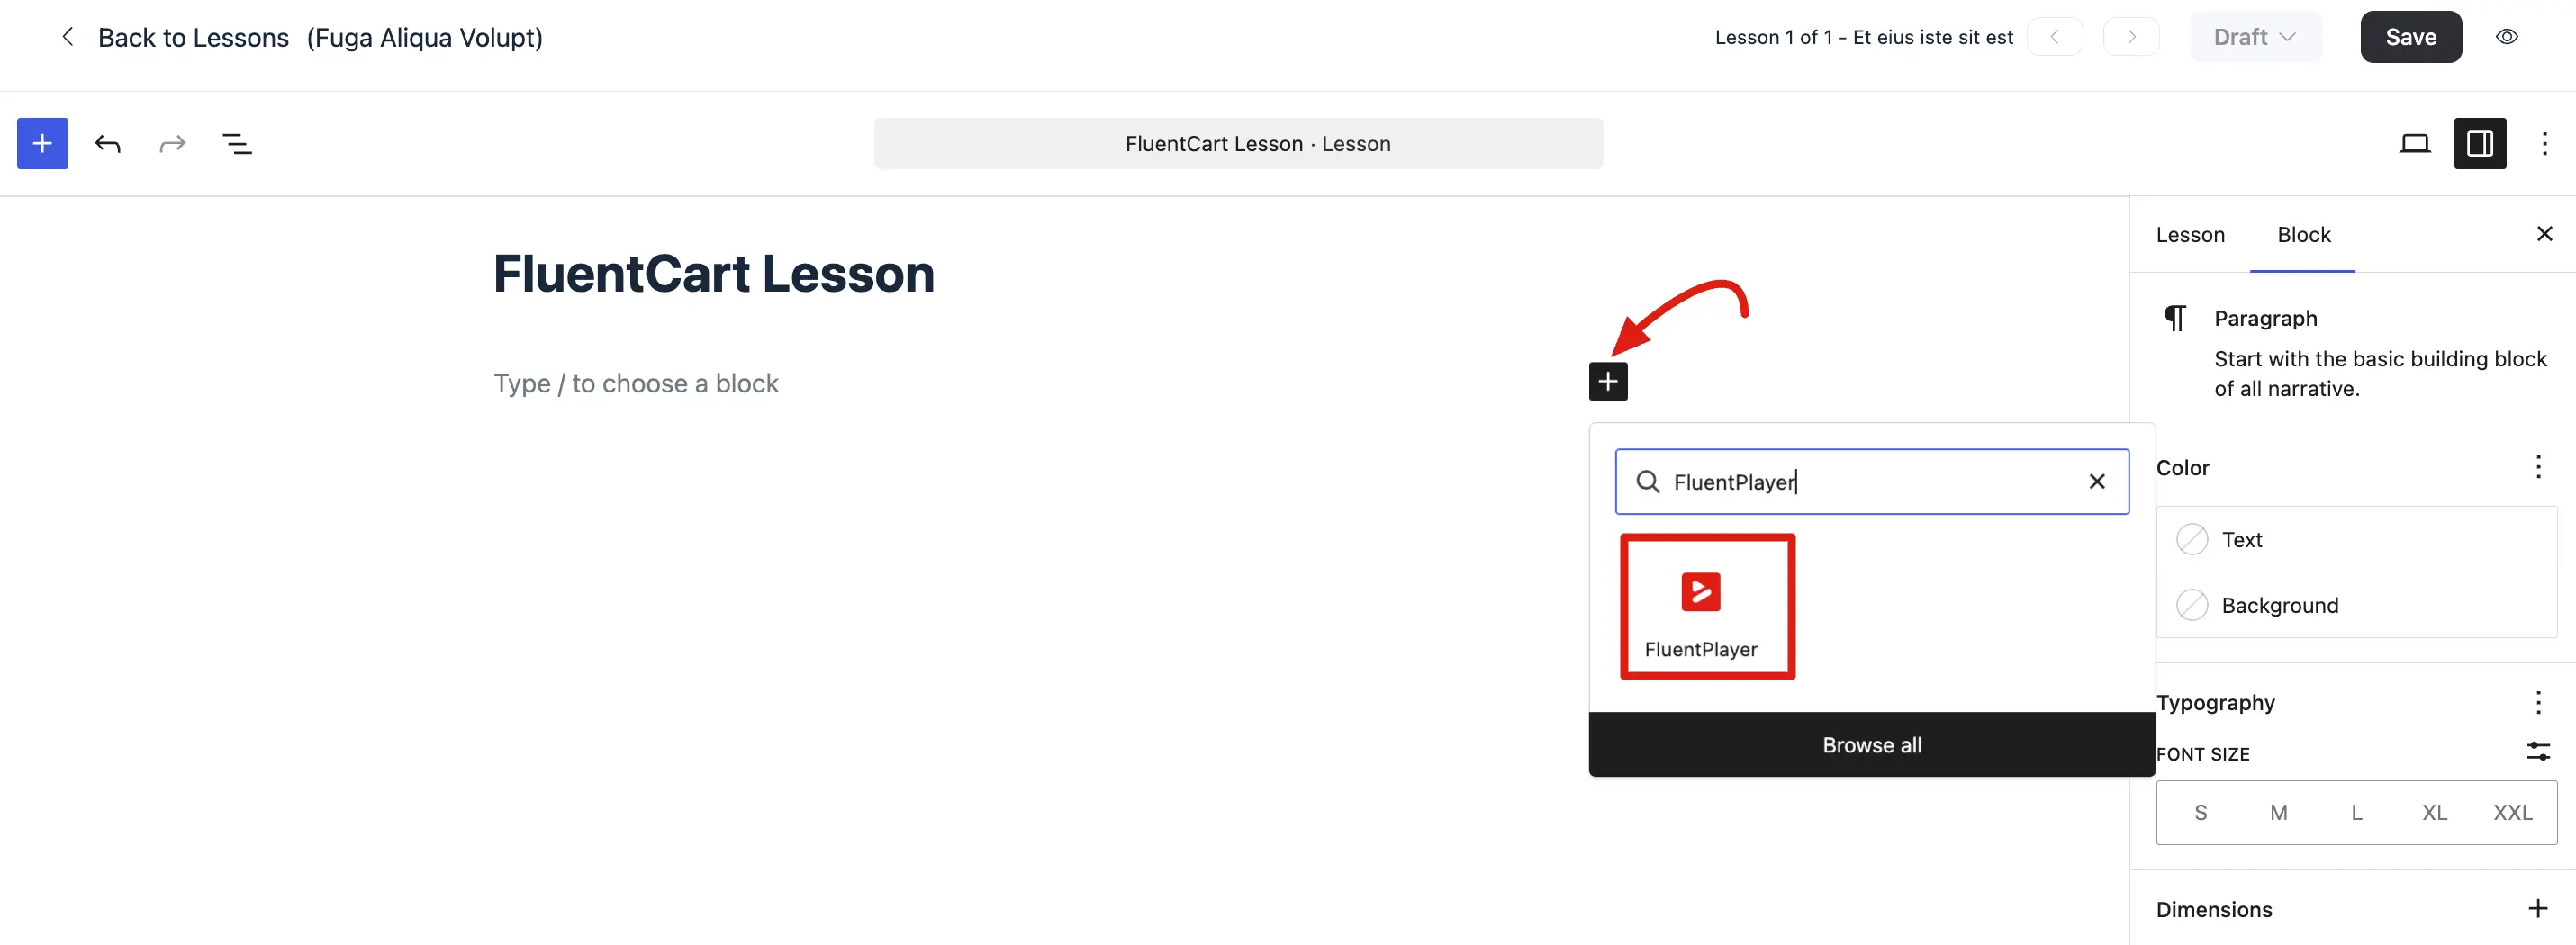
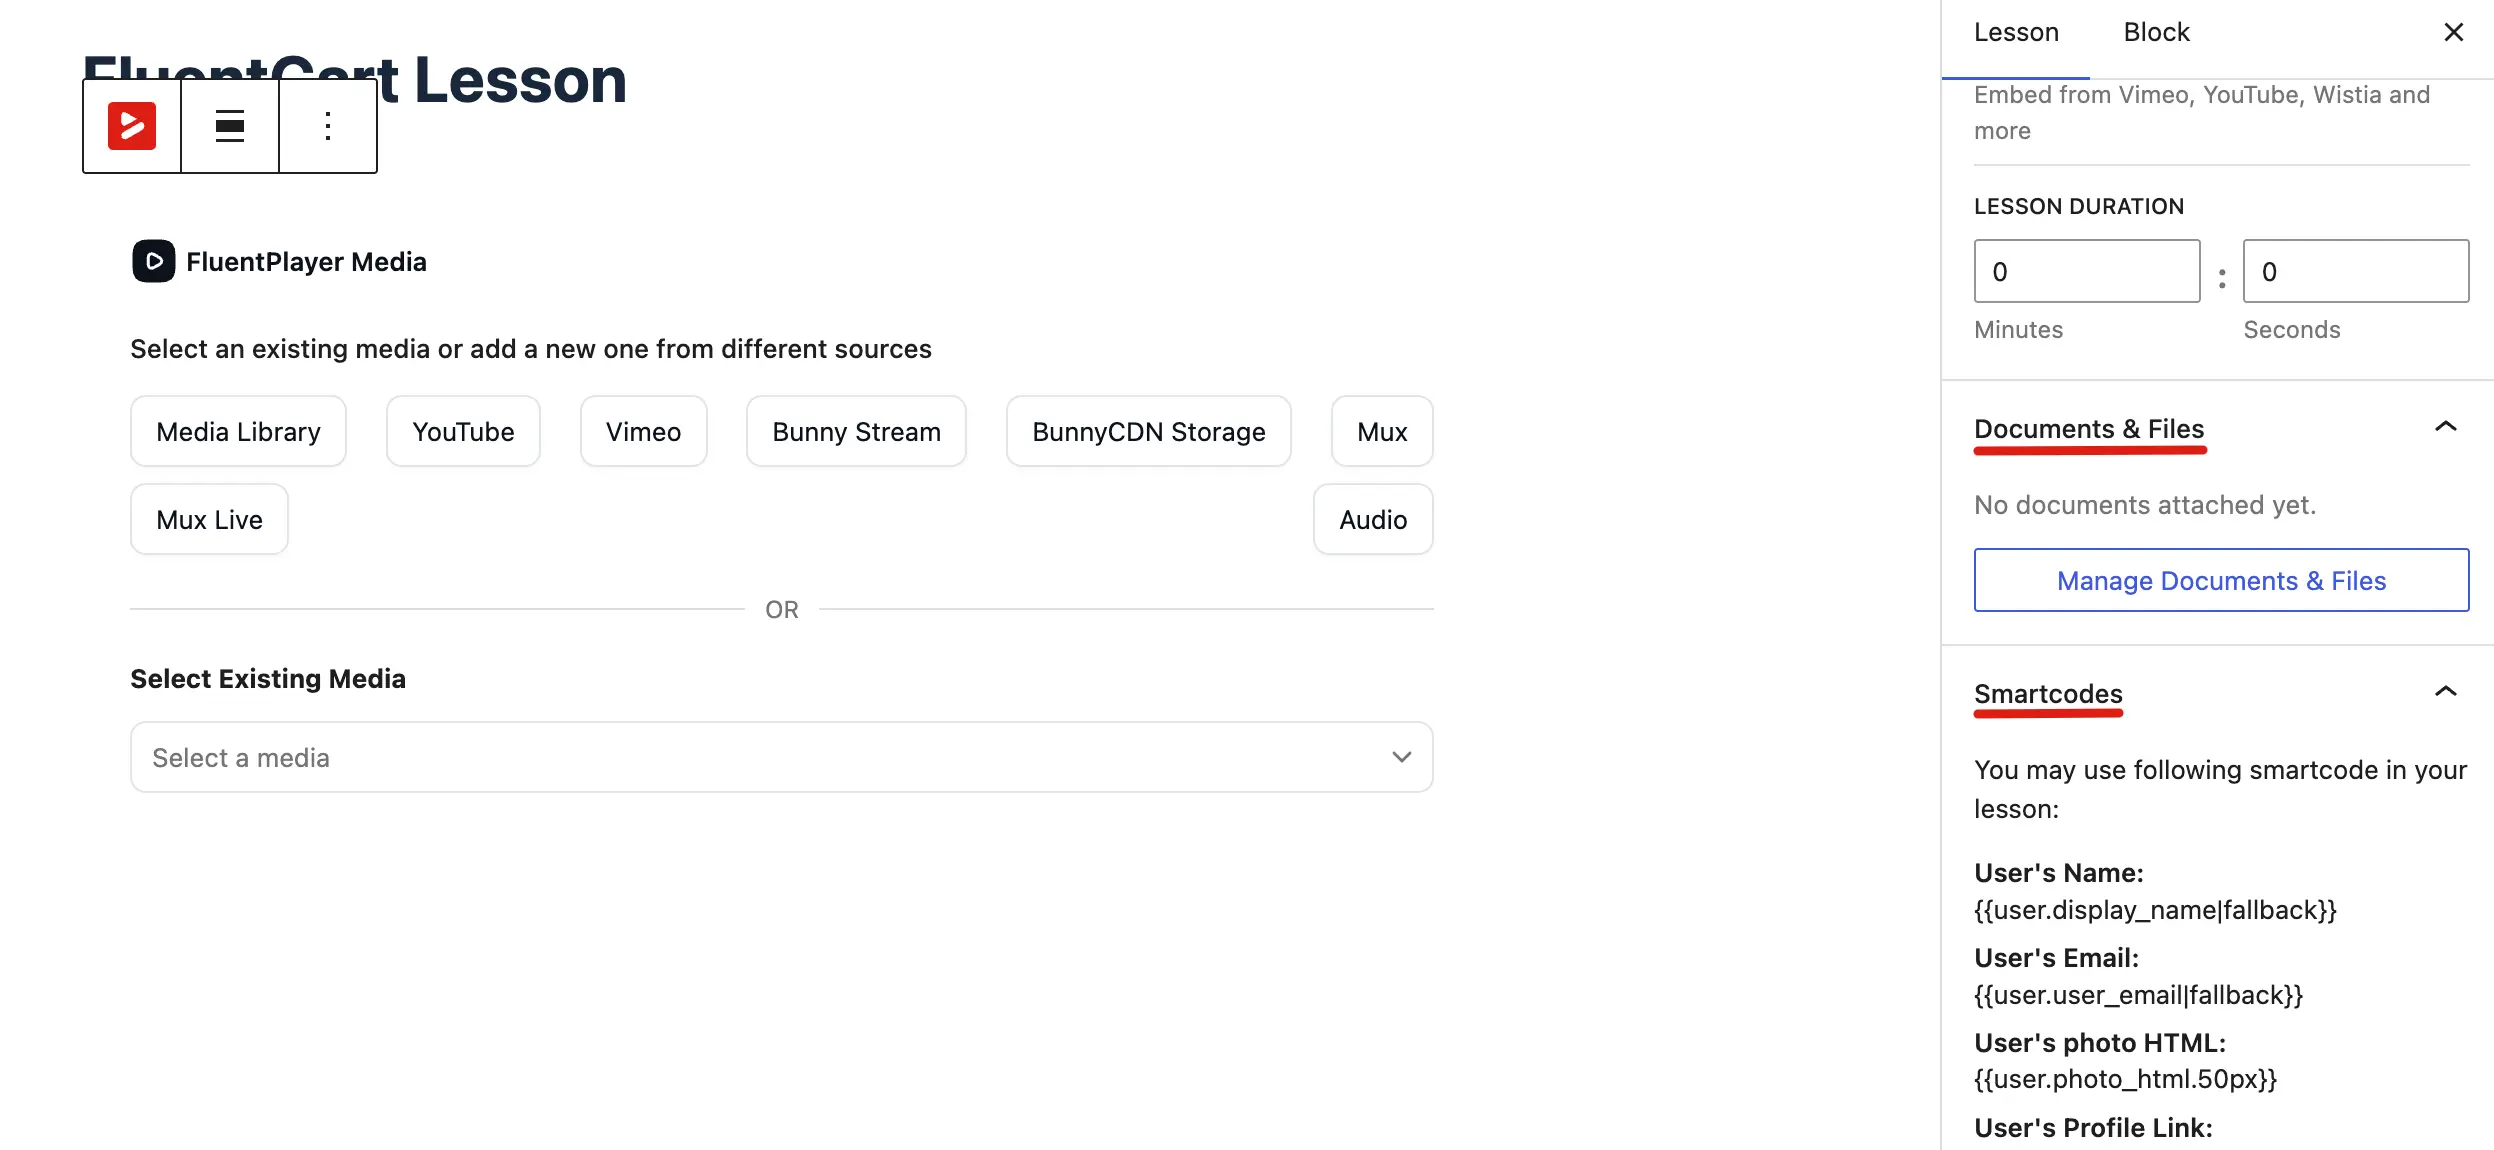
You can select an existing video from your library or add a new one from sources like Bunny Stream, Mux, or YouTube.
2. Configuring Lesson Settings (Sidebar)
Use the right hand sidebar under the Lesson tab to manage specific lesson details:
- Video Visibility: Ensure Enable Video Embed is checked.
- Media Embed: You can also use the sidebar to paste Oembed links or Custom HTML if you prefer not to use the block editor.
- Lesson Duration: Input the total length of the video so students can track their progress.
- Comments: Toggle comments ON to allow students to discuss the lesson content.

3. Attaching Documents
- Scroll to the Documents & Files section in the sidebar.
- Click Manage Documents & Files.
- A popup will appear where you can upload files that students can view and download alongside the video.
4. Personalizing with Smartcodes
- Open the Smartcodes dropdown in the sidebar to see a list of available tags.
- Copy tags like
{{user.display_name}}to insert dynamic member data into your lesson description.
NOTE
To save server storage, it is highly recommended to restrict video uploads to Admins and Moderators only via the Player Settings in the community configuration panel.
Embedding a playlist in lessons (Pro)
Besides single videos, you can embed an entire FluentPlayer playlist inside FluentCommunity lessons and portal content using the FluentPlayer Playlist block:
- In the lesson editor, click (+) and search for FluentPlayer Playlist.
- Select an existing playlist (or a tag-based playlist).
- Configure the layout and appearance as you would anywhere else.
This is ideal for course modules where a lesson should present a sequence of videos rather than a single clip. See the Playlists documentation for creating and styling playlists.
By combining advanced playback controls with direct community uploads and lesson-specific features like document attachments, FluentPlayer provides a seamless, distraction-free environment for both social interaction and professional learning.