Appearance
CTA (Call to Action) Overlay (Pro)
The CTA overlay is a popup that appears over the video at a specific time to prompt the viewer to take an action, such as visiting a link, signing up, or watching another video. The video pauses while the overlay is on screen, so the viewer's full attention is on your message.
Pro feature
The CTA layer requires FluentPlayer Pro. In the free plugin, only the Fluent Forms layer and the Email Capture layer are available in the Interactive Layers panel.
How It Works
At a time you choose (for example, 2 minutes into the video), playback pauses and a full screen overlay appears with whatever content you have designed in the built in editor. The viewer can interact with the overlay (click a button, read your message) or skip past it if you allow skipping. Playback resumes once the overlay is dismissed.
Setting Up a CTA Overlay
- Go to FluentPlayer → Media and open the media item you want to add a CTA to.
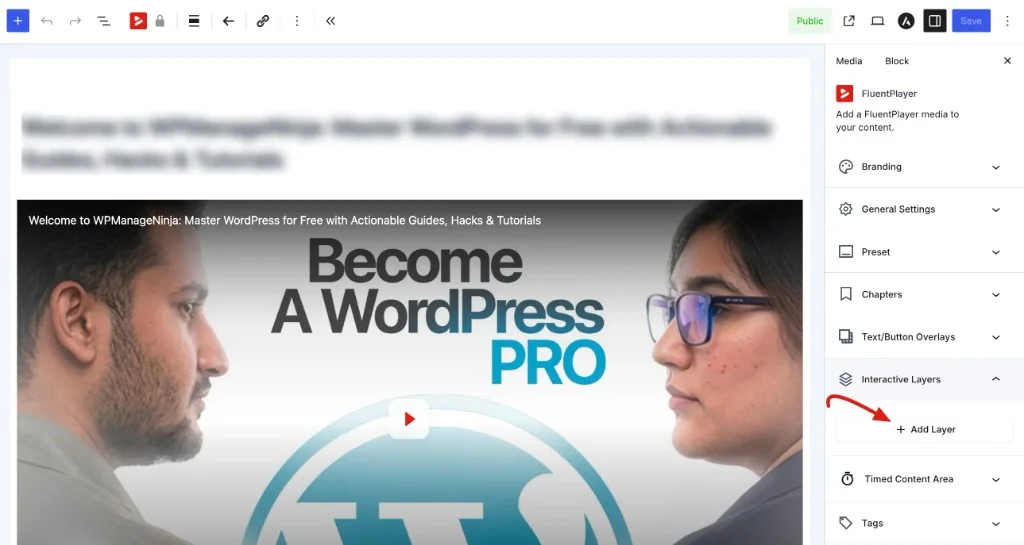
- In the right sidebar, expand the Interactive Layers panel.
- Click + Add Layer to open the Manage Layers dialog.
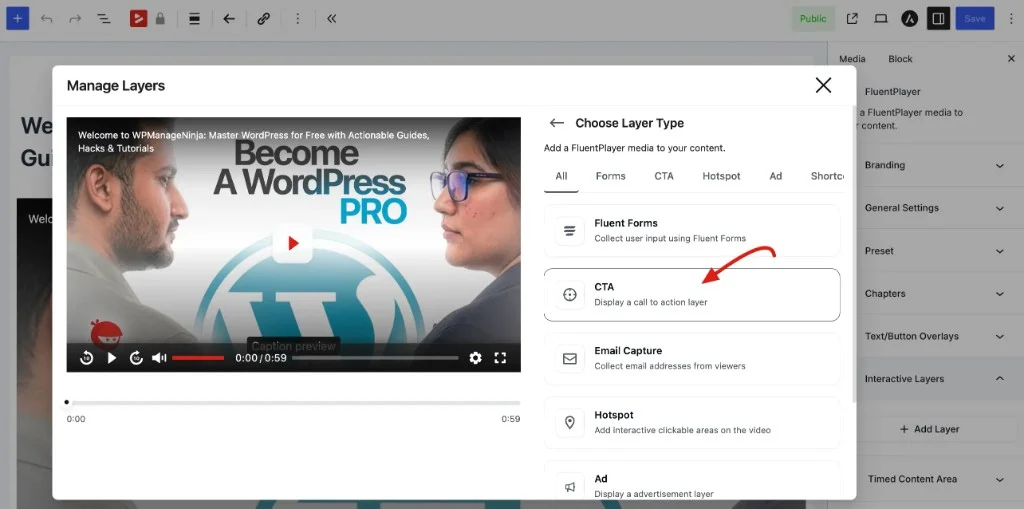
- Under Choose Layer Type, select CTA. You can filter layer types using the tabs at the top (All, Forms, CTA, Hotspot, Ad, Shortcodes).
- Configure each accordion section below, then click Add Layer to save. Click Save on the media item to publish your changes.
Display
The Display section controls when the CTA appears and how it is dismissed.
- Start Time: Set the exact Hours, Minutes, and Seconds when the overlay should appear. The preview shows when the layer will trigger (for example, "Layer will appear at 0:00").
- Completion Type: Choose what counts as completing the layer before playback resumes:
| Option | What it means |
|---|---|
| Link Click | The layer completes when the viewer clicks a link or button inside the overlay. This is the default and works well for most CTAs. |
| Auto Dismiss | The layer disappears on its own after a set duration, with no viewer interaction required. |
| Skip Only | The layer stays on screen until the viewer manually clicks Skip. |

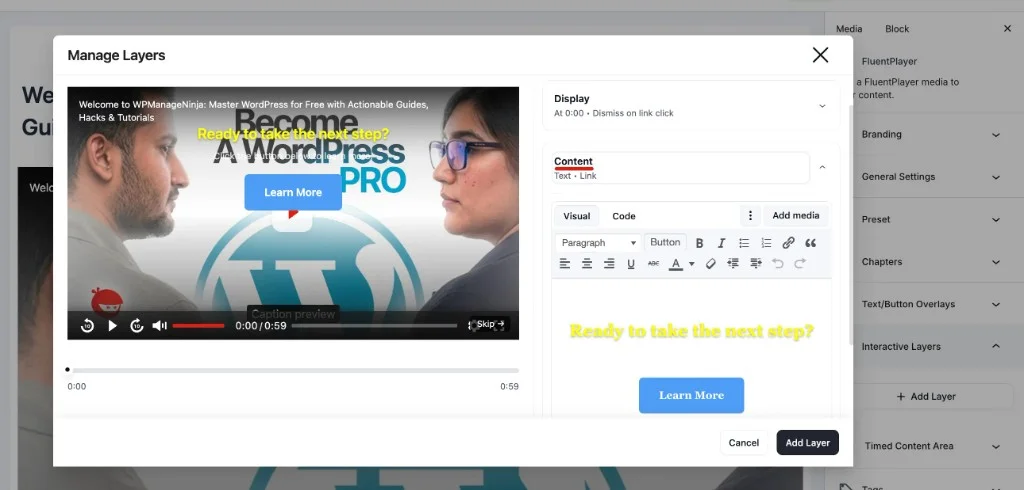
Content
The Content section uses a rich text editor — the same type you use when writing WordPress posts. Design the overlay directly in the editor; what you see in the preview is what the viewer sees on screen.
- Visual and Code tabs let you switch between a WYSIWYG editor and raw HTML.
- The Visual toolbar includes Heading, Button, bold/italic/underline, text color, links, alignment, blockquote, and Add media.
- There are no separate fields for headline or button text — you build the entire overlay in one editor.
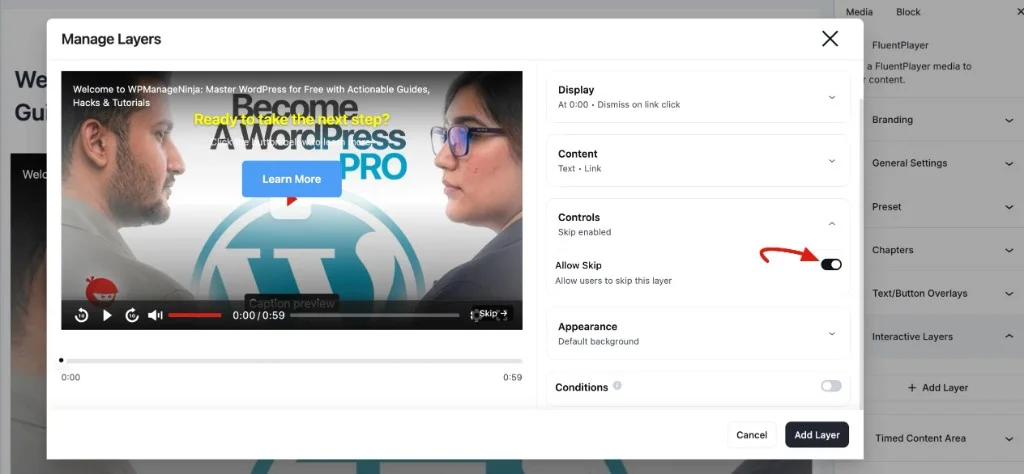
Controls
The Controls section decides whether viewers can bypass the overlay.
- Allow Skip: Toggle On to show a Skip button on the player so viewers can dismiss the overlay without clicking your CTA. Toggle Off to require interaction (for example, a link click) before the video continues.
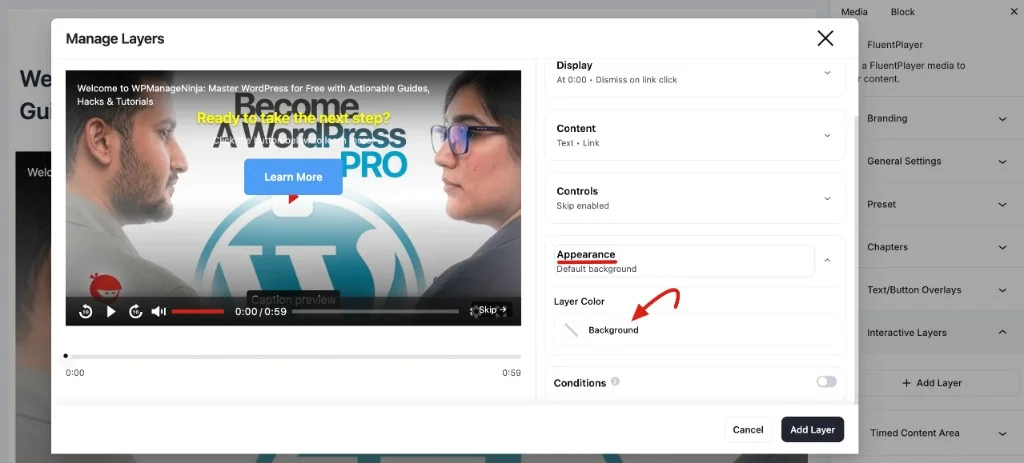
Appearance
The Appearance section styles the overlay background.
- Layer Color: Set the Background color behind your CTA content. Use this to keep text readable against the video frame underneath — for example, a semi transparent dark background behind white text.
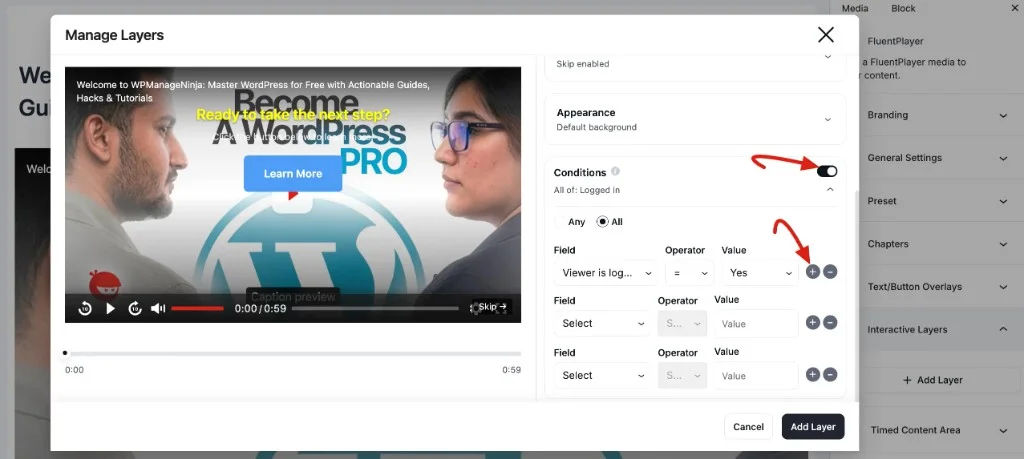
Conditions
The Conditions section lets you show the CTA only when specific rules are met.
- Toggle Conditions on.
- Choose Any (show if at least one rule matches) or All (show only if every rule matches).
- Add condition rows using the Field, Operator, and Value dropdowns. Examples include Viewer is logged in, Viewer is CRM contact, Viewer has CRM tag, and URL query parameter.
- Use + and − to add or remove condition rows.
TIP
Keep your CTA content short and focused. A strong heading, one line of supporting text, and a single button is the most effective pattern. Too much content in an overlay can overwhelm the viewer.
Editing a CTA Layer
After you add a CTA layer, it appears in the Interactive Layers panel in the right sidebar. Each layer shows the layer type (CTA), its trigger time (for example, 0:00), an Edit button, and a delete icon.
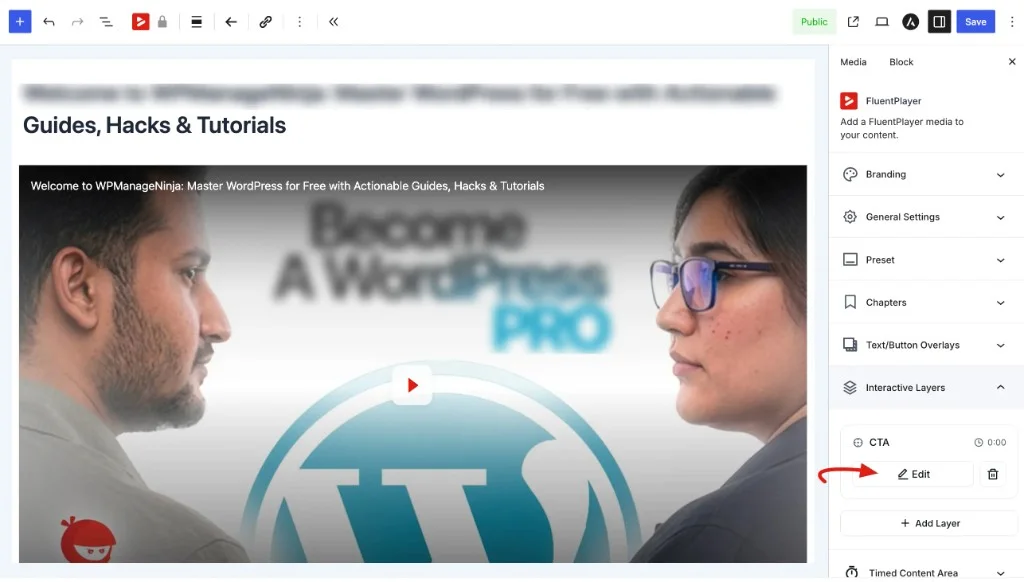
To make changes to an existing layer:
- Click Edit on the layer in the Interactive Layers panel.
- The Manage Layers dialog opens with your saved settings (Display, Content, Controls, Appearance, and Conditions).
- Make your changes and click Update Layer to save.
You can add multiple CTA layers to the same media item — for example, one at the 2 minute mark and another near the end.
Example: End of Video Upsell
You have a product demo and want to direct viewers to your pricing page near the end:
- Start Time:
0h 15m 0s(near the end of a 17 minute video) - Content:
- Heading: "Like what you see?"
- Text: "Start your free trial today."
- Button: "Get Started" → links to
https://example.com/signup
Example: Mid Video Resource Link
You are recording a tutorial and want to share a downloadable resource at the 5 minute mark:
- Start Time:
0h 5m 0s - Content:
- Heading: "Grab the cheat sheet"
- Text: "Download the companion PDF to follow along."
- Button: "Download Now" → links to your resource URL