Appearance
Email Capture Overlay
The email capture overlay pauses the video and shows a signup form to the viewer. They enter their email address — and optionally subscribe to your list — before they can continue watching. It is one of FluentPlayer's most effective tools for growing your email list without any third-party pop-up plugins.
How It Works
At a configured point during playback (for example, at the 1 minute mark), the player pauses and displays an overlay with a headline, an email input field, and a submit button. The viewer must enter their email to continue watching, or dismiss the overlay if skipping is allowed. Submitted emails are sent to whichever provider you have attached to the layer (for example, FluentCRM).
Setting Up Email Capture
- Go to FluentPlayer → Media and open the media item you want to gate.
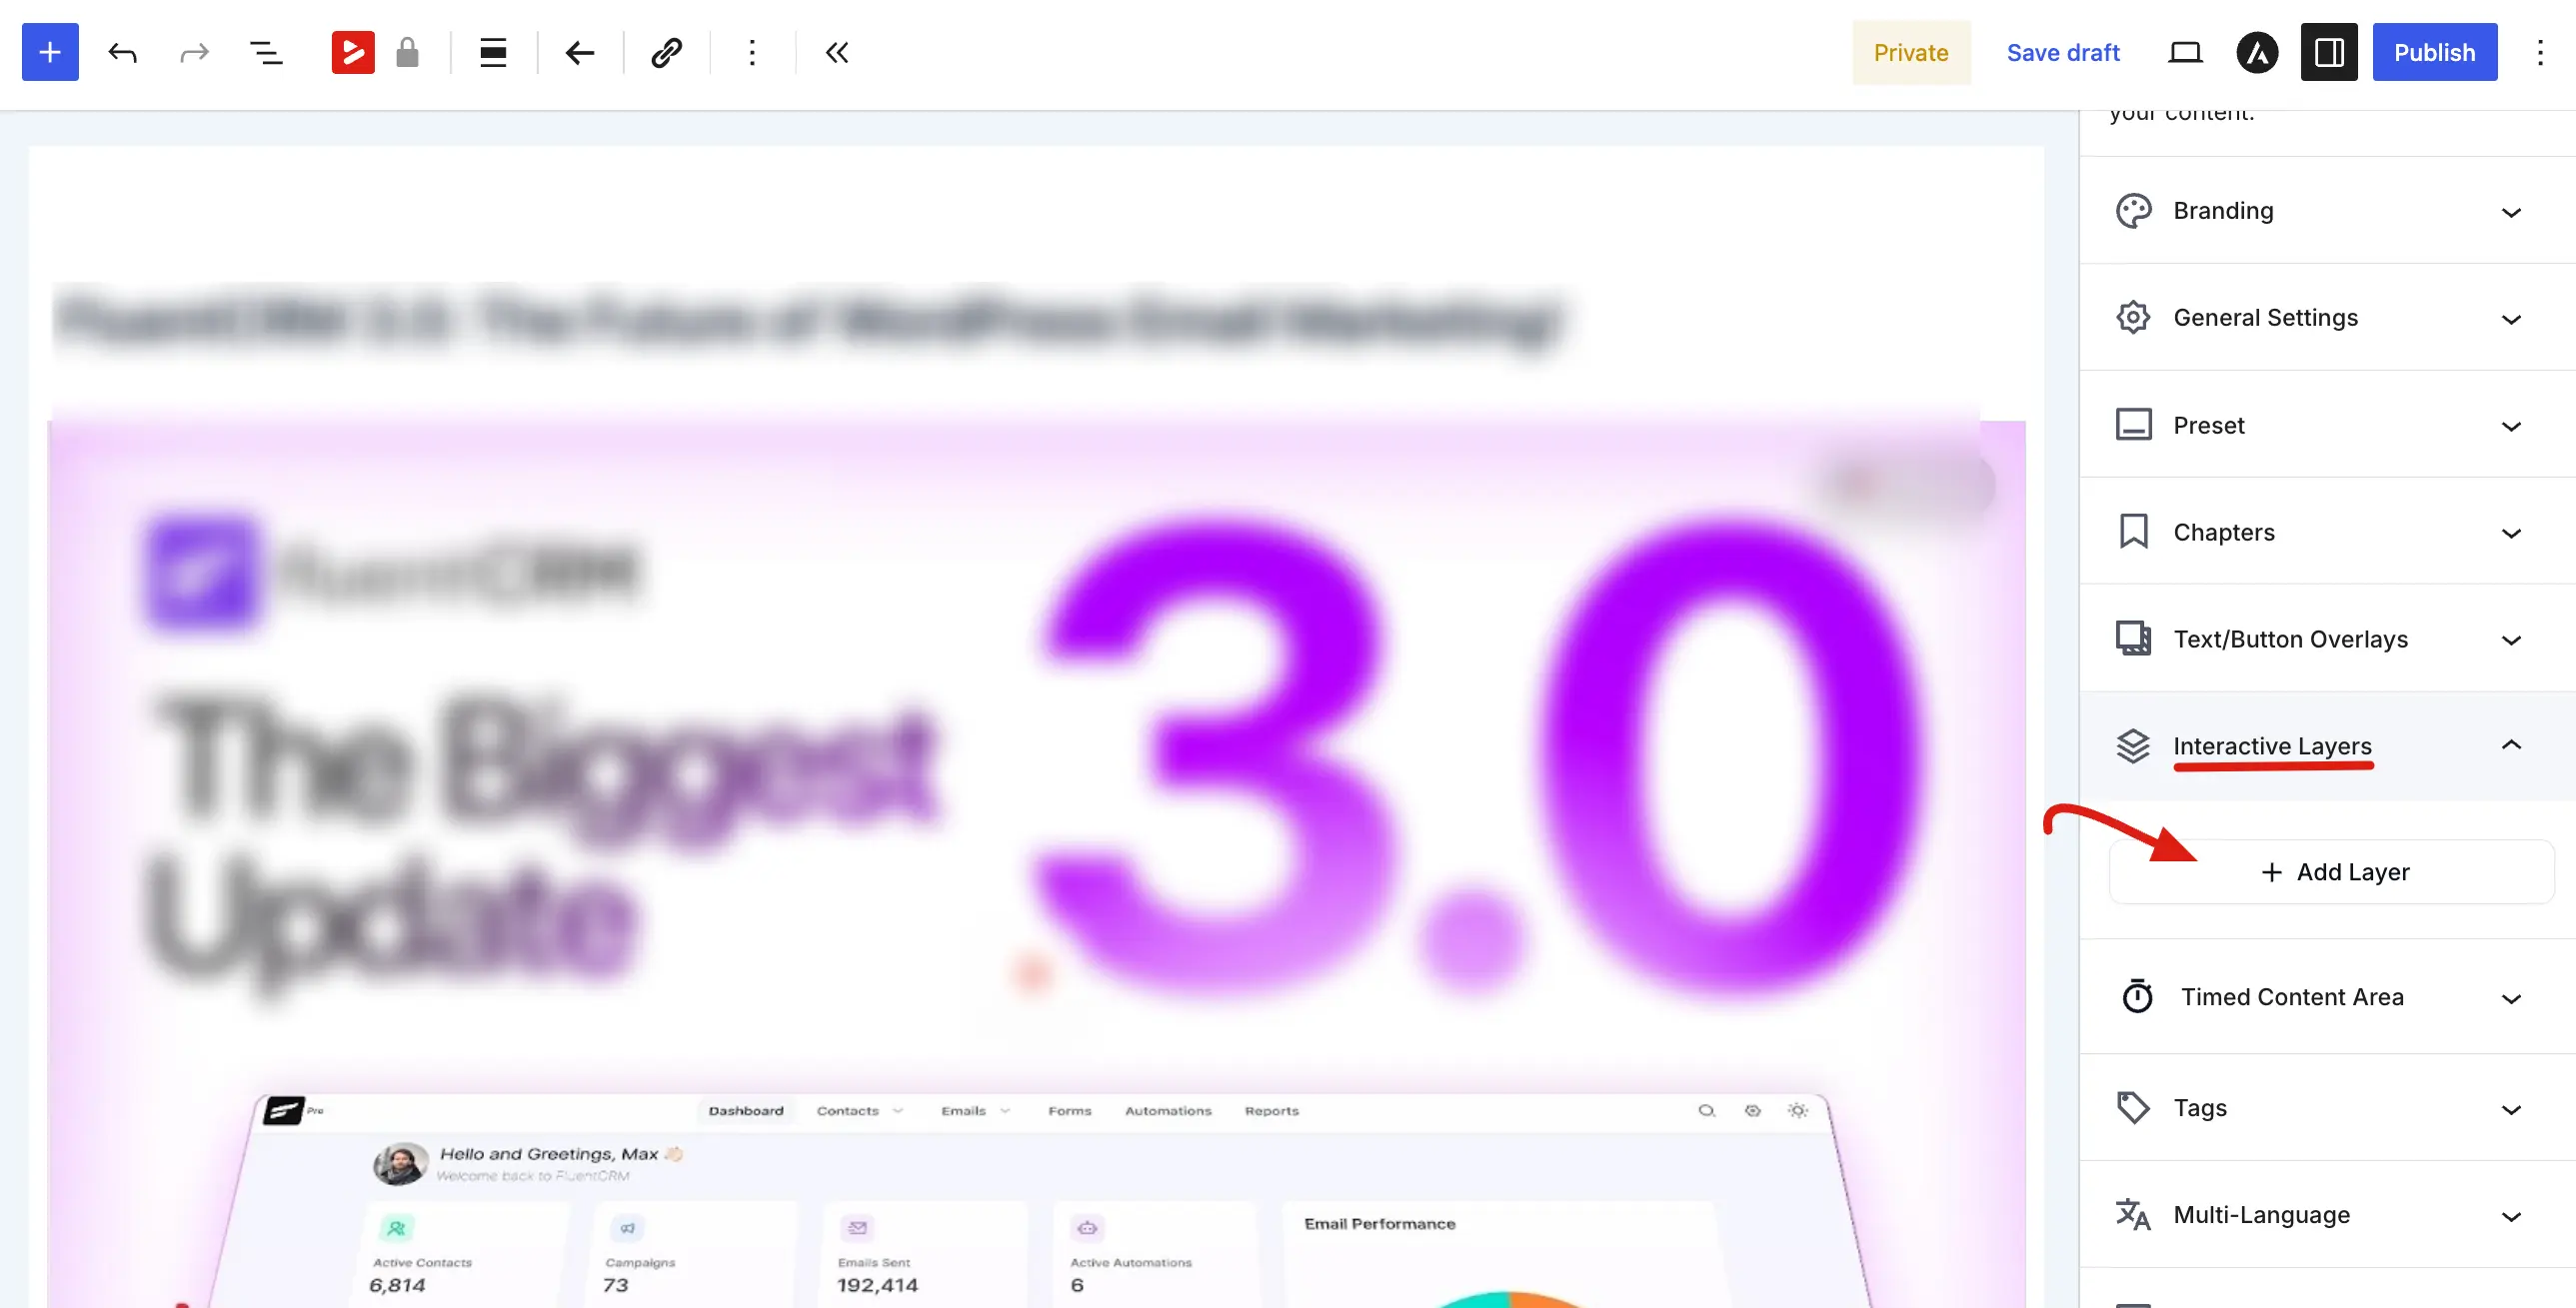
- In the right sidebar, expand the Interactive Layers panel.
- Click + Add Layer to open the Manage Layers dialog.
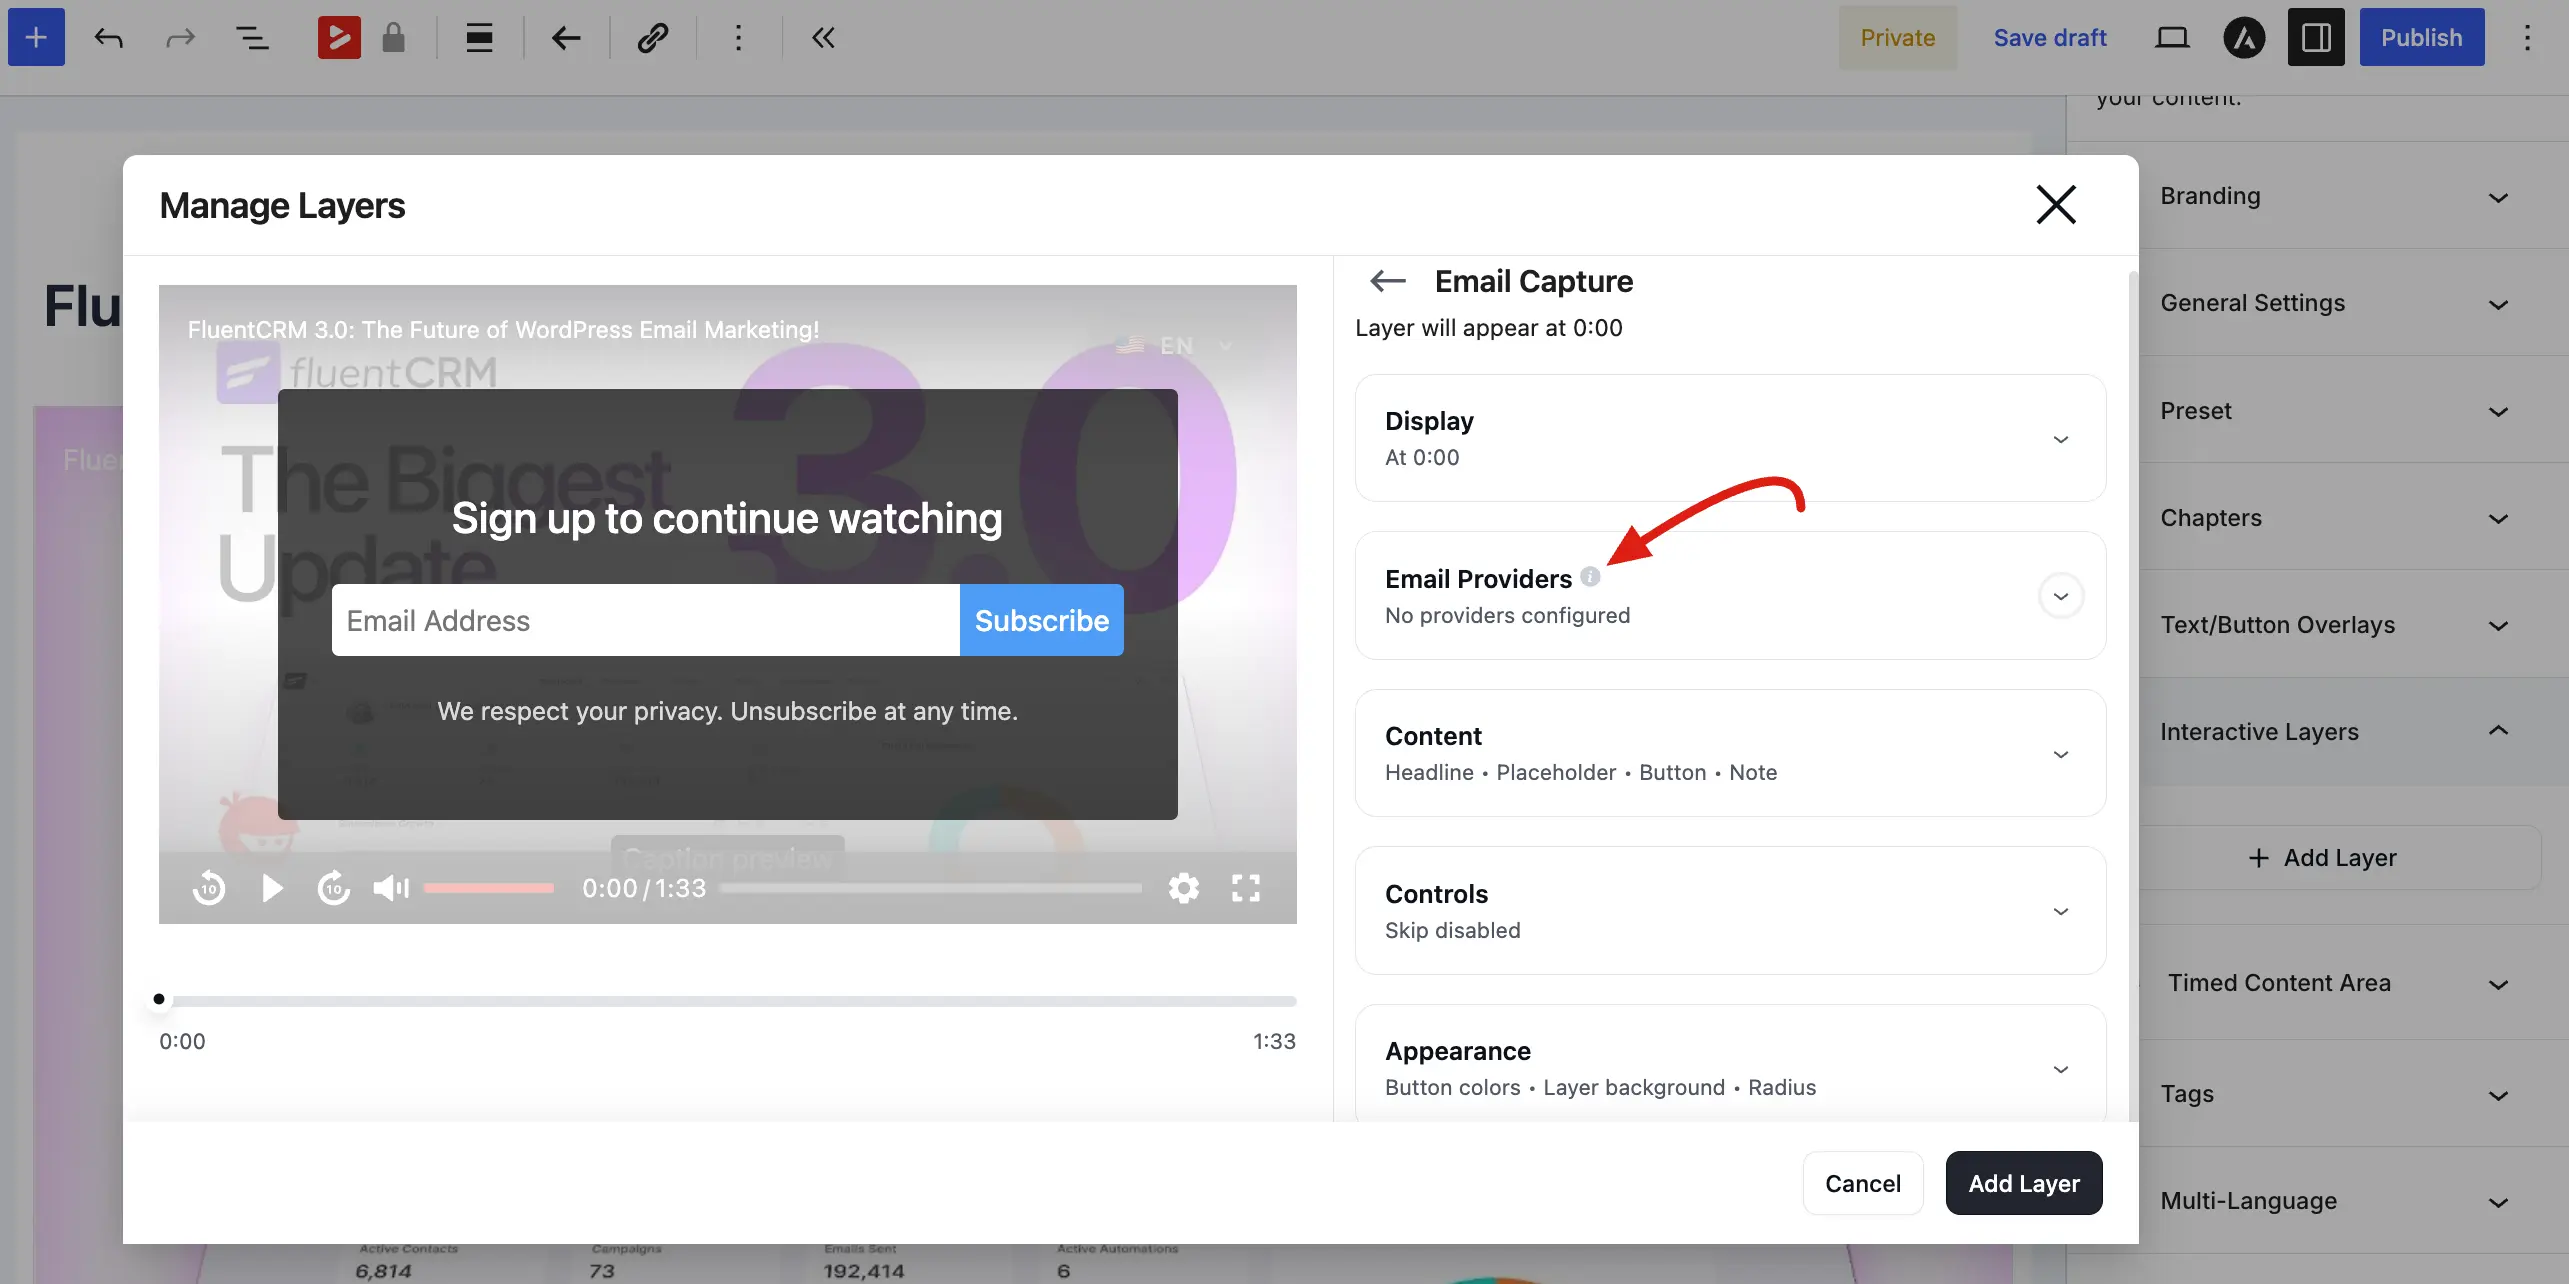
- Choose Email Capture as the layer type. The Manage Layers window shows a live preview on the left and configuration accordions on the right.
- Configure each accordion section below, then click Add Layer to save. Click Save on the media item to publish your changes.
Your email gate is now live on every page where that media is embedded.
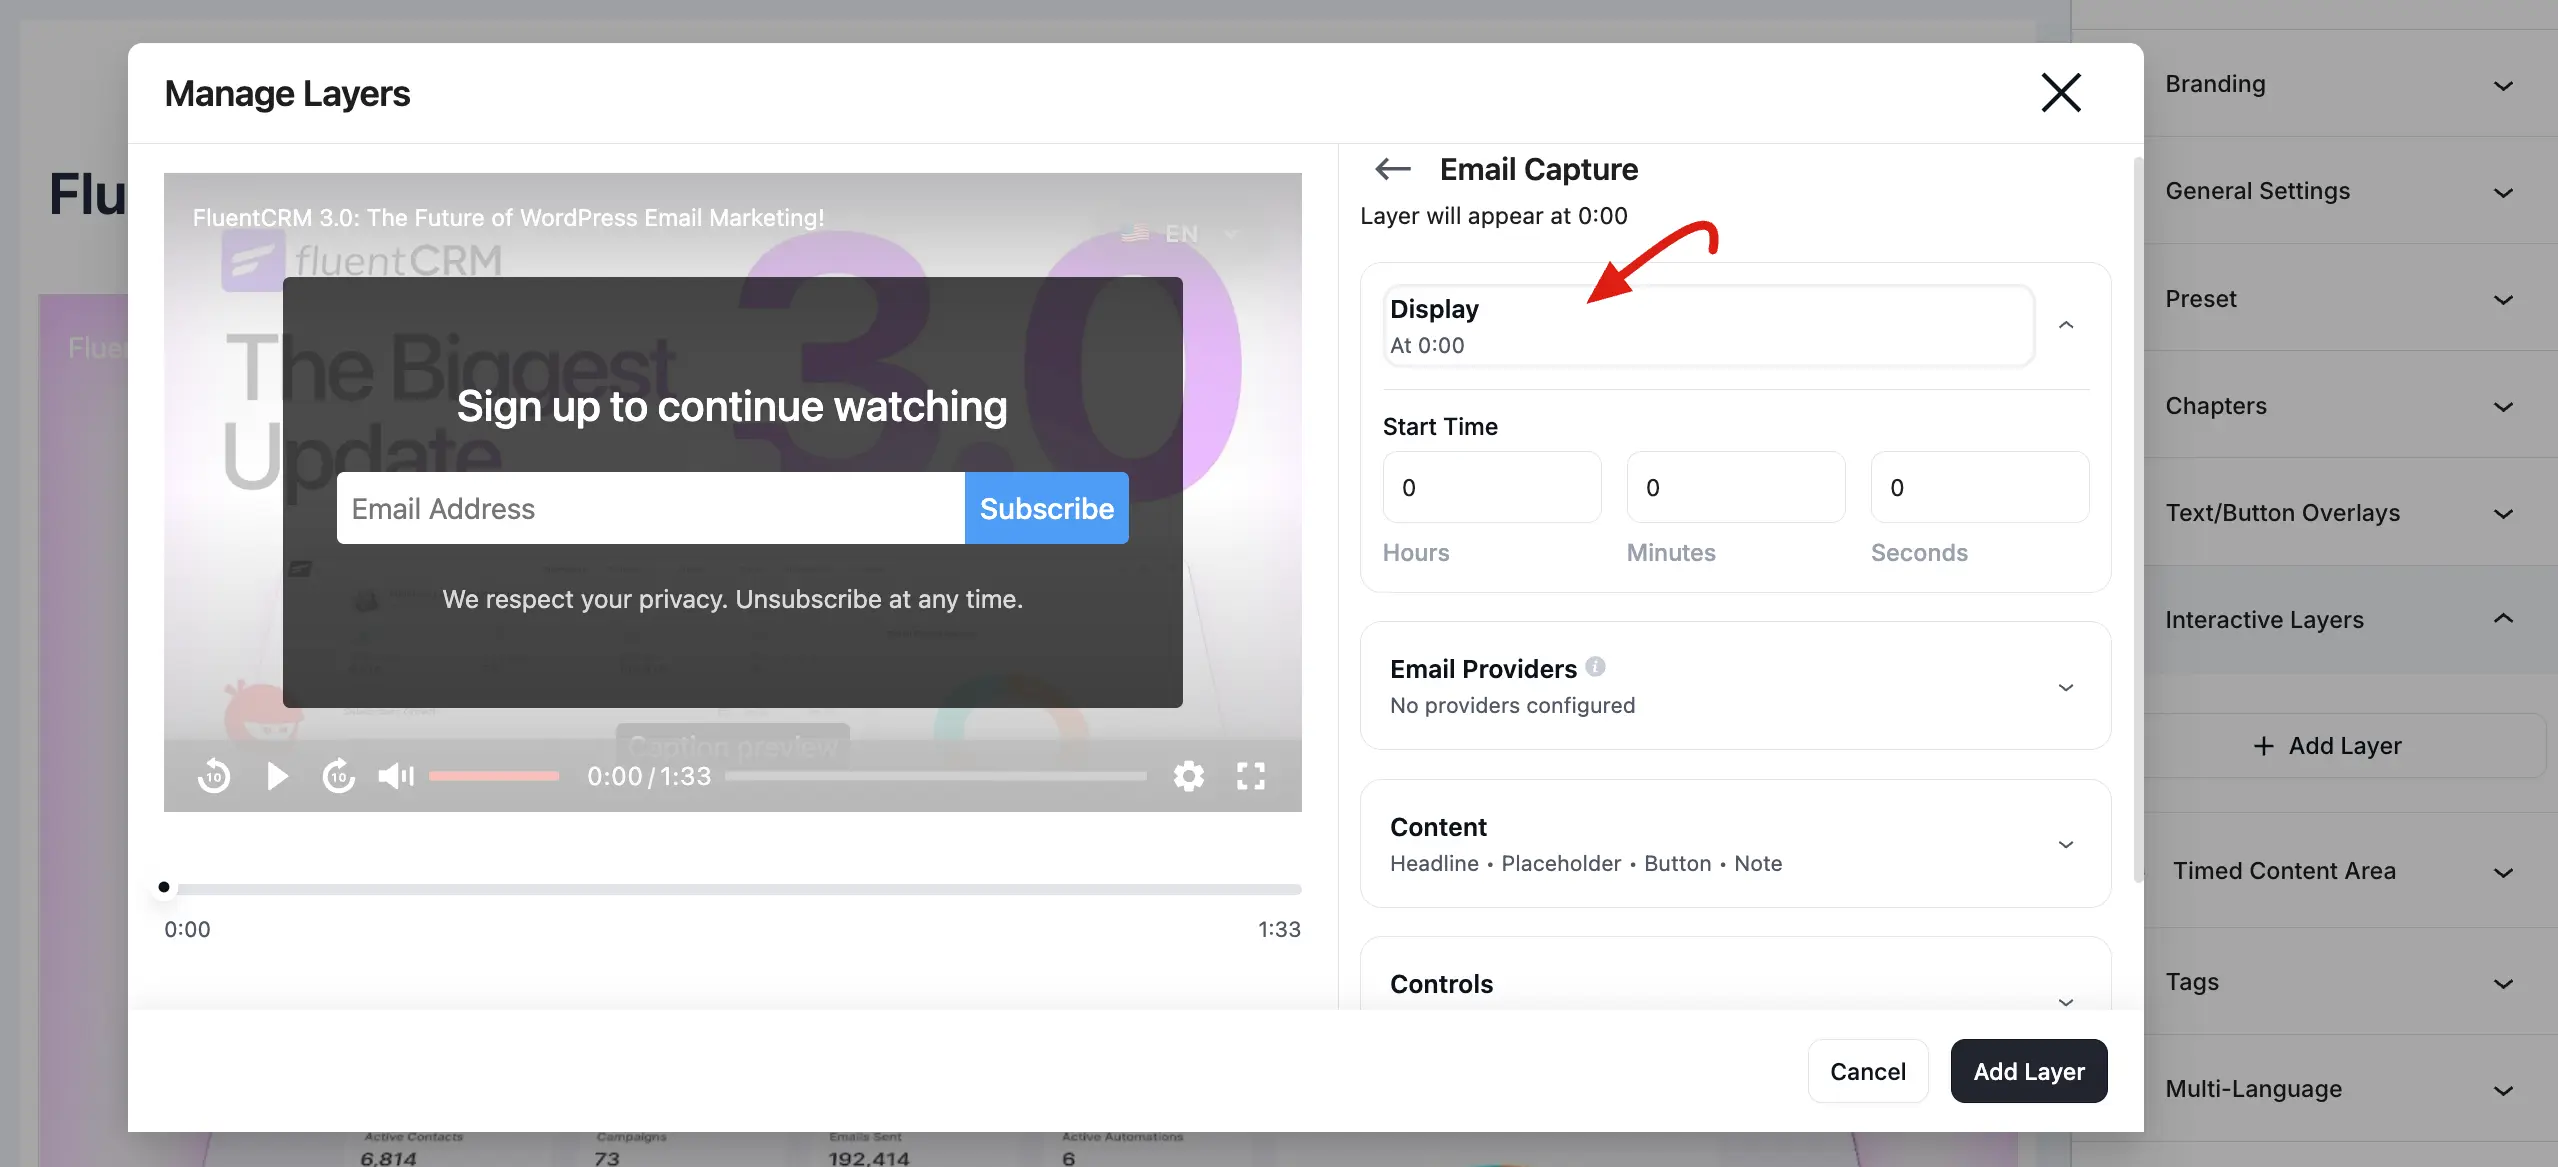
Display
The Display section controls when the overlay appears.
Start Time: Set the exact Hours, Minutes, and Seconds when the email capture form should show. The preview updates to show when the layer will appear (for example, "Layer will appear at 0:00").
Use the Video Preview on the left to scrub the timeline and confirm the timing before saving.
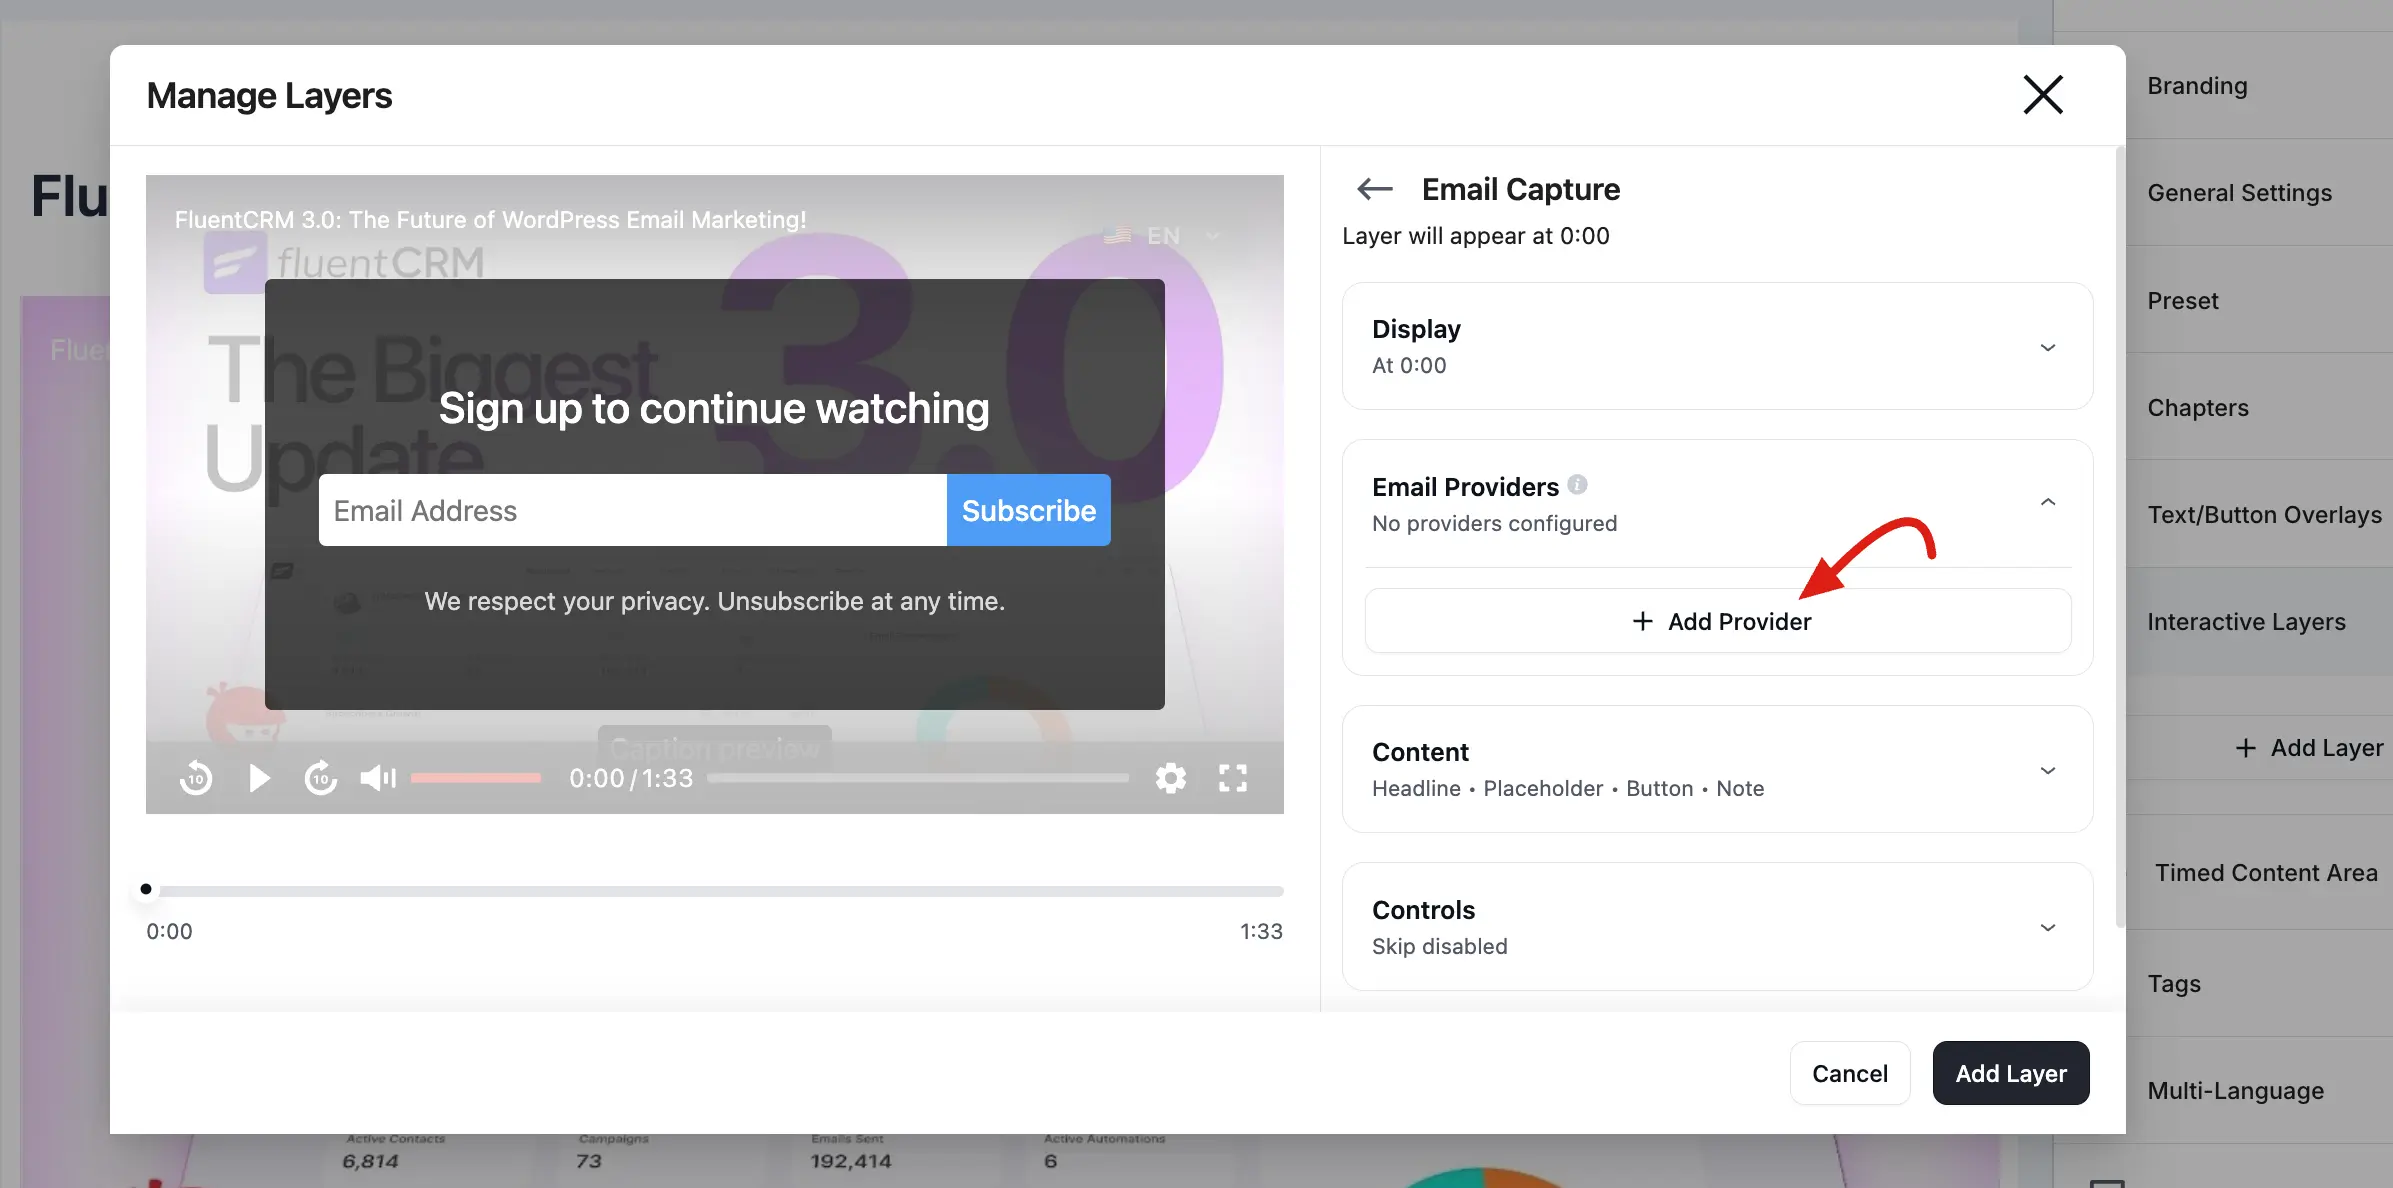
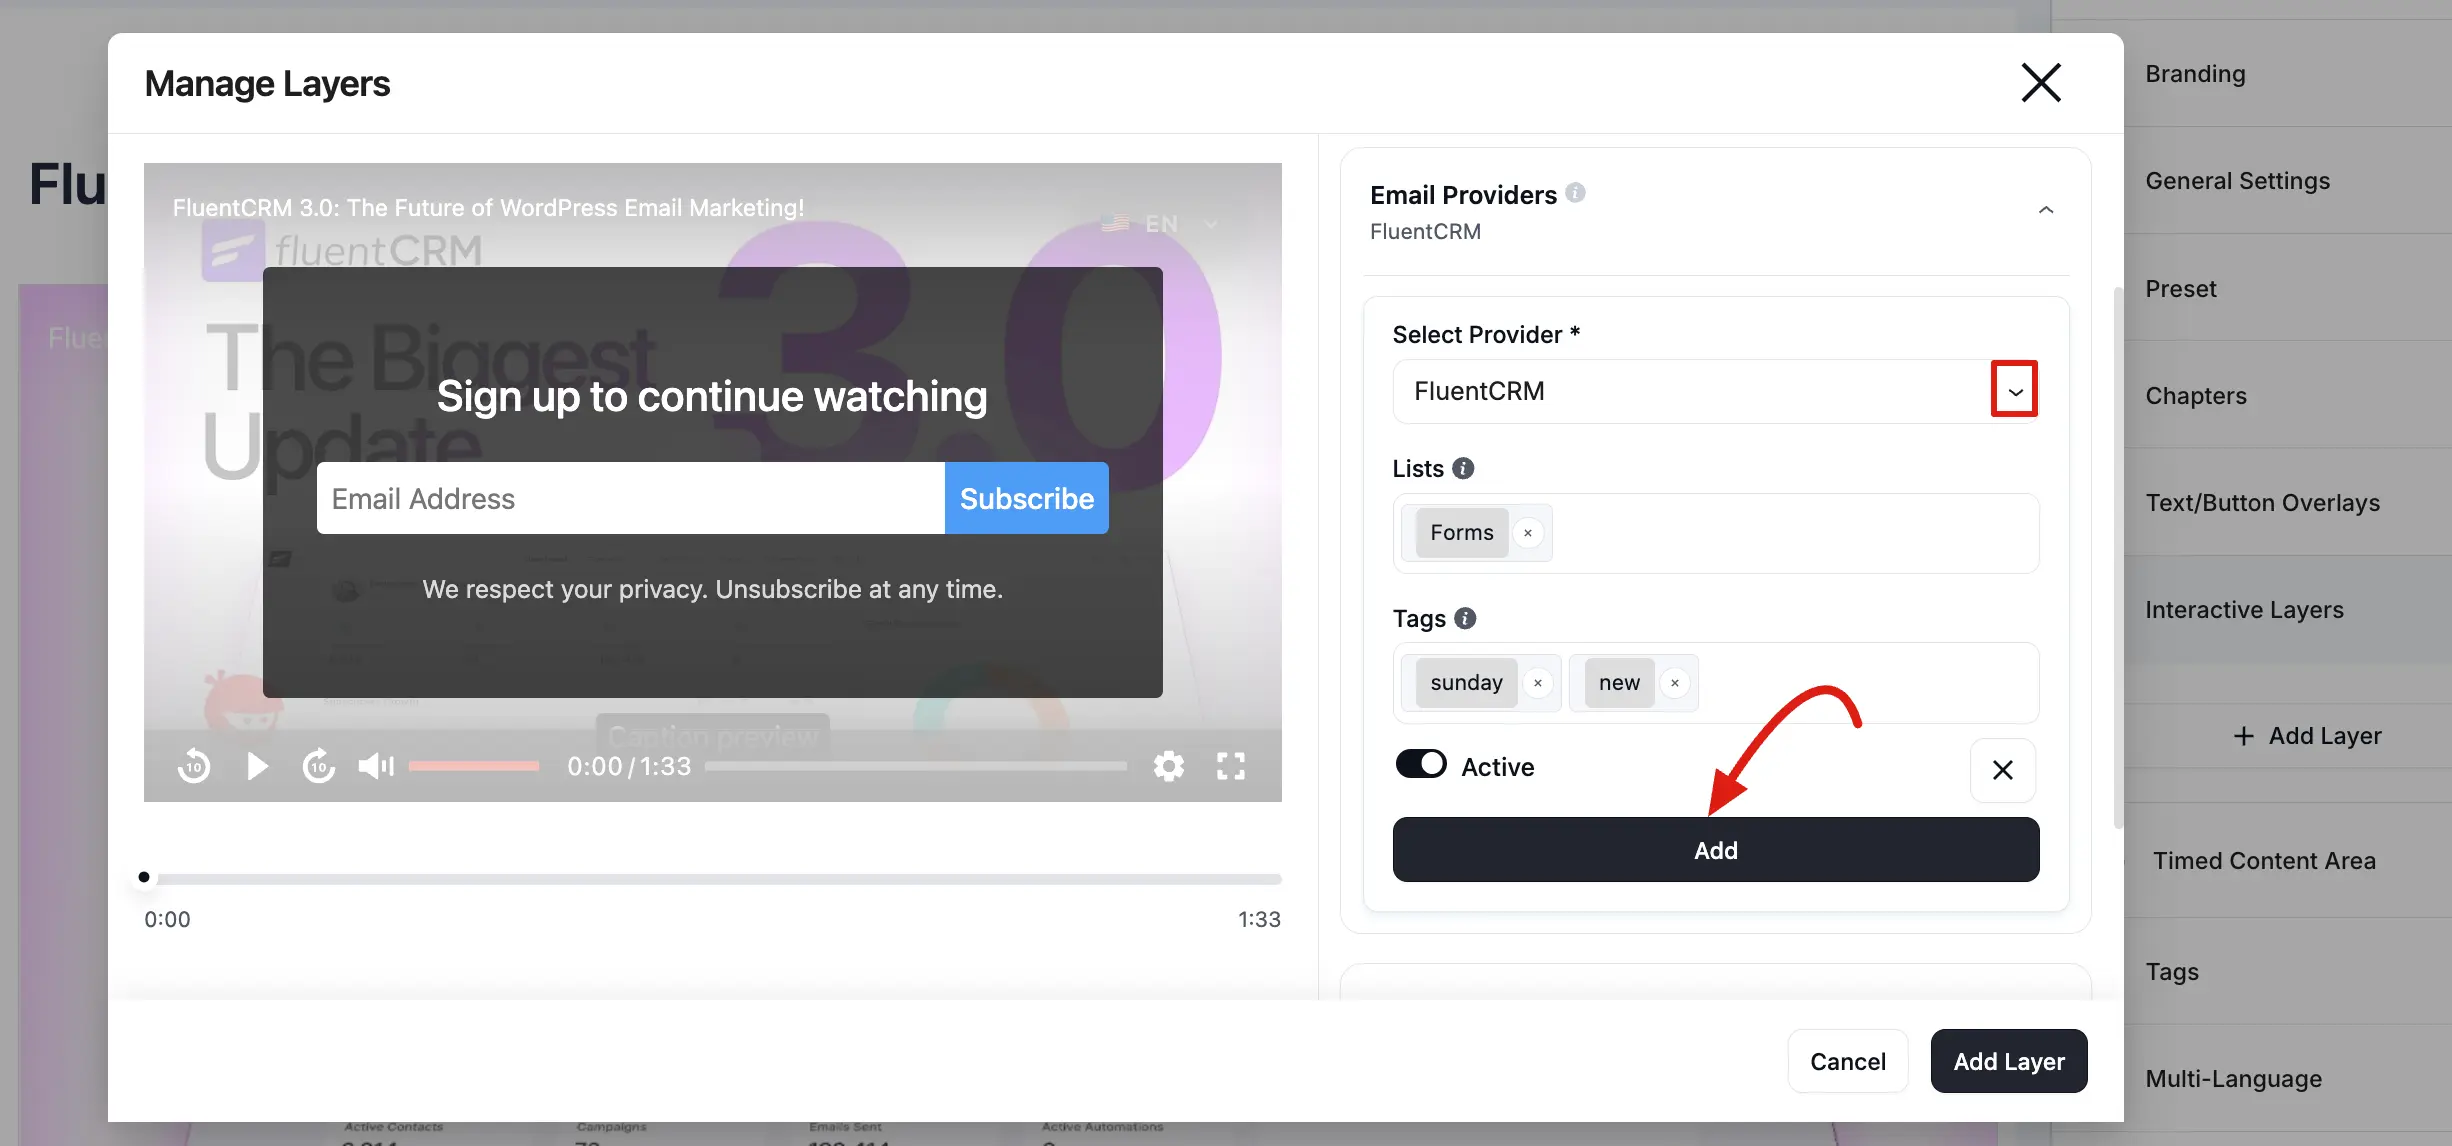
Email Providers
Email providers are configured inside the Email Capture layer, not on a separate settings page.
- Expand the Email Providers accordion.
- Click + Add Provider if no provider is connected yet.
- Choose a provider from the Select Provider dropdown (for example, FluentCRM, Mailchimp, or Webhook).
- Configure the provider options, then click Add.
| Option | Description |
|---|---|
| Lists | Select which list(s) to add the subscriber to |
| Tags | Assign tags to the new contact |
| Active | Toggle the provider on or off for this layer |
You can add multiple providers to a single Email Capture layer if needed. FluentPlayer supports:
- FluentCRM: Adds contacts directly to your WordPress native CRM with list and tag assignments.
- Mailchimp: Sends subscribers to a Mailchimp audience.
- Webhook: Posts email data to any URL (for Zapier, Make, HubSpot, and similar tools).
See Email Providers for the full setup guide.
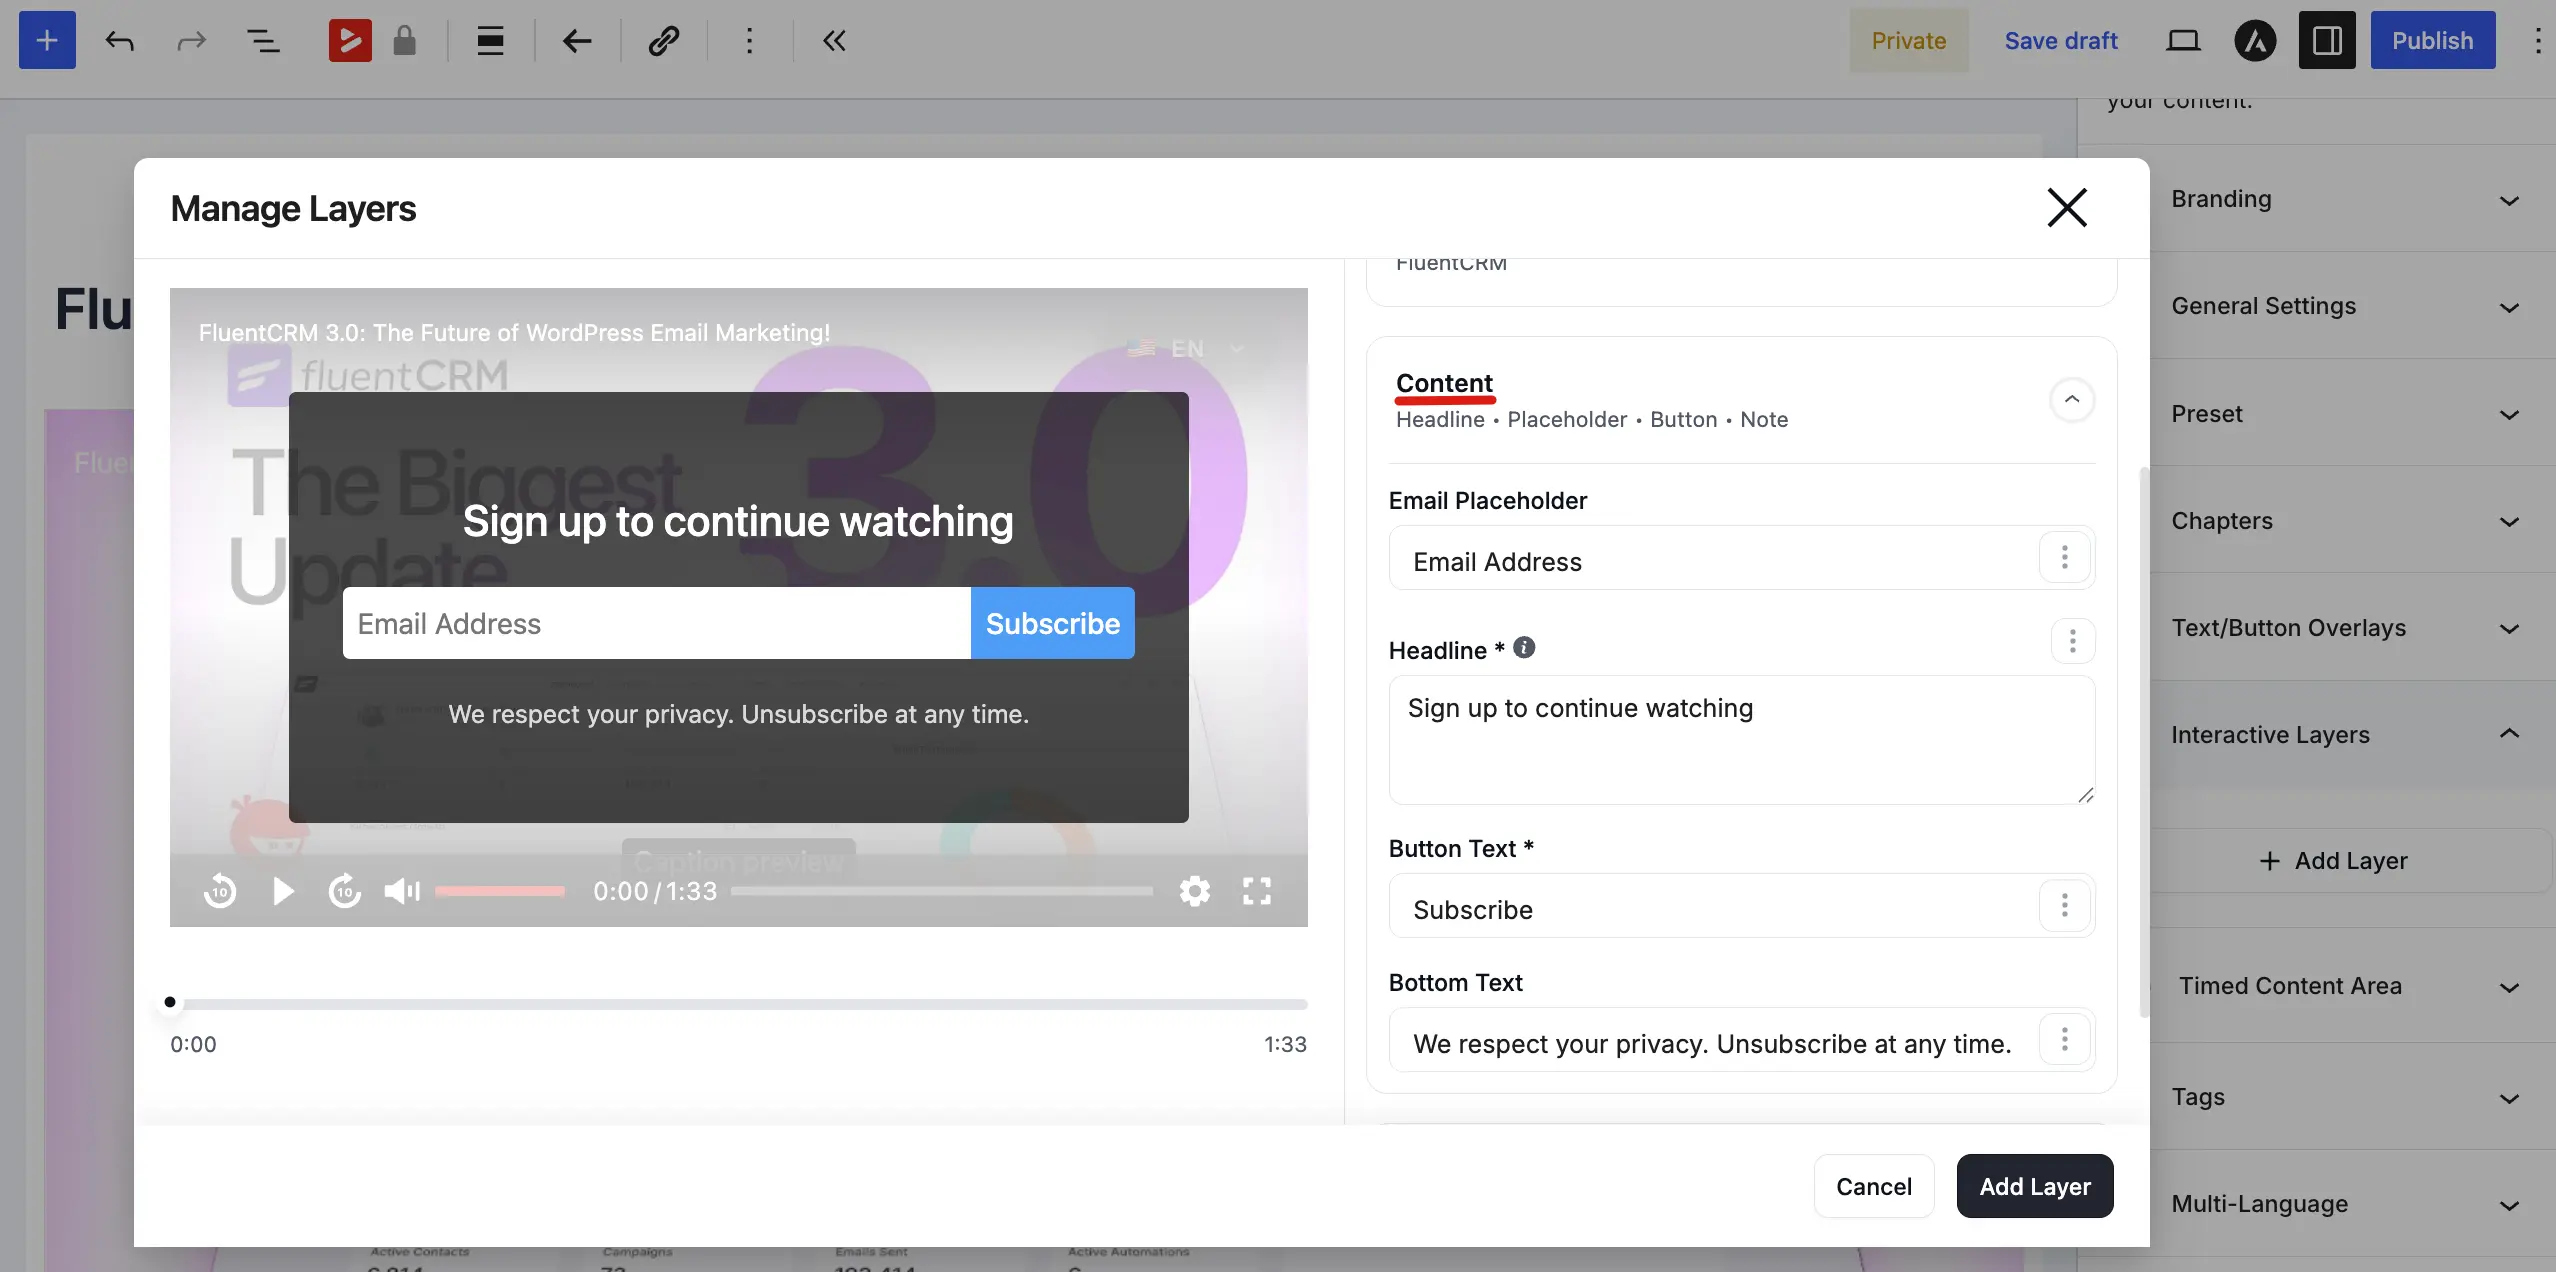
Content
The Content section controls the text viewers see on the overlay.
- Headline: Main message above the email field (for example, "Sign up to continue watching").
- Email Placeholder: Placeholder text inside the email input (for example, "Email Address").
- Button Text: Label on the submit button (for example, "Subscribe").
- Bottom Text: Small text below the button, such as a privacy note (for example, "We respect your privacy. Unsubscribe at any time.").
Controls
The Controls section decides whether viewers can bypass the form.
- Allow Skipping: Toggle On to show a Skip button so viewers can close the overlay and keep watching without submitting an email. Toggle Off to create a hard gate — viewers must submit their email to continue.
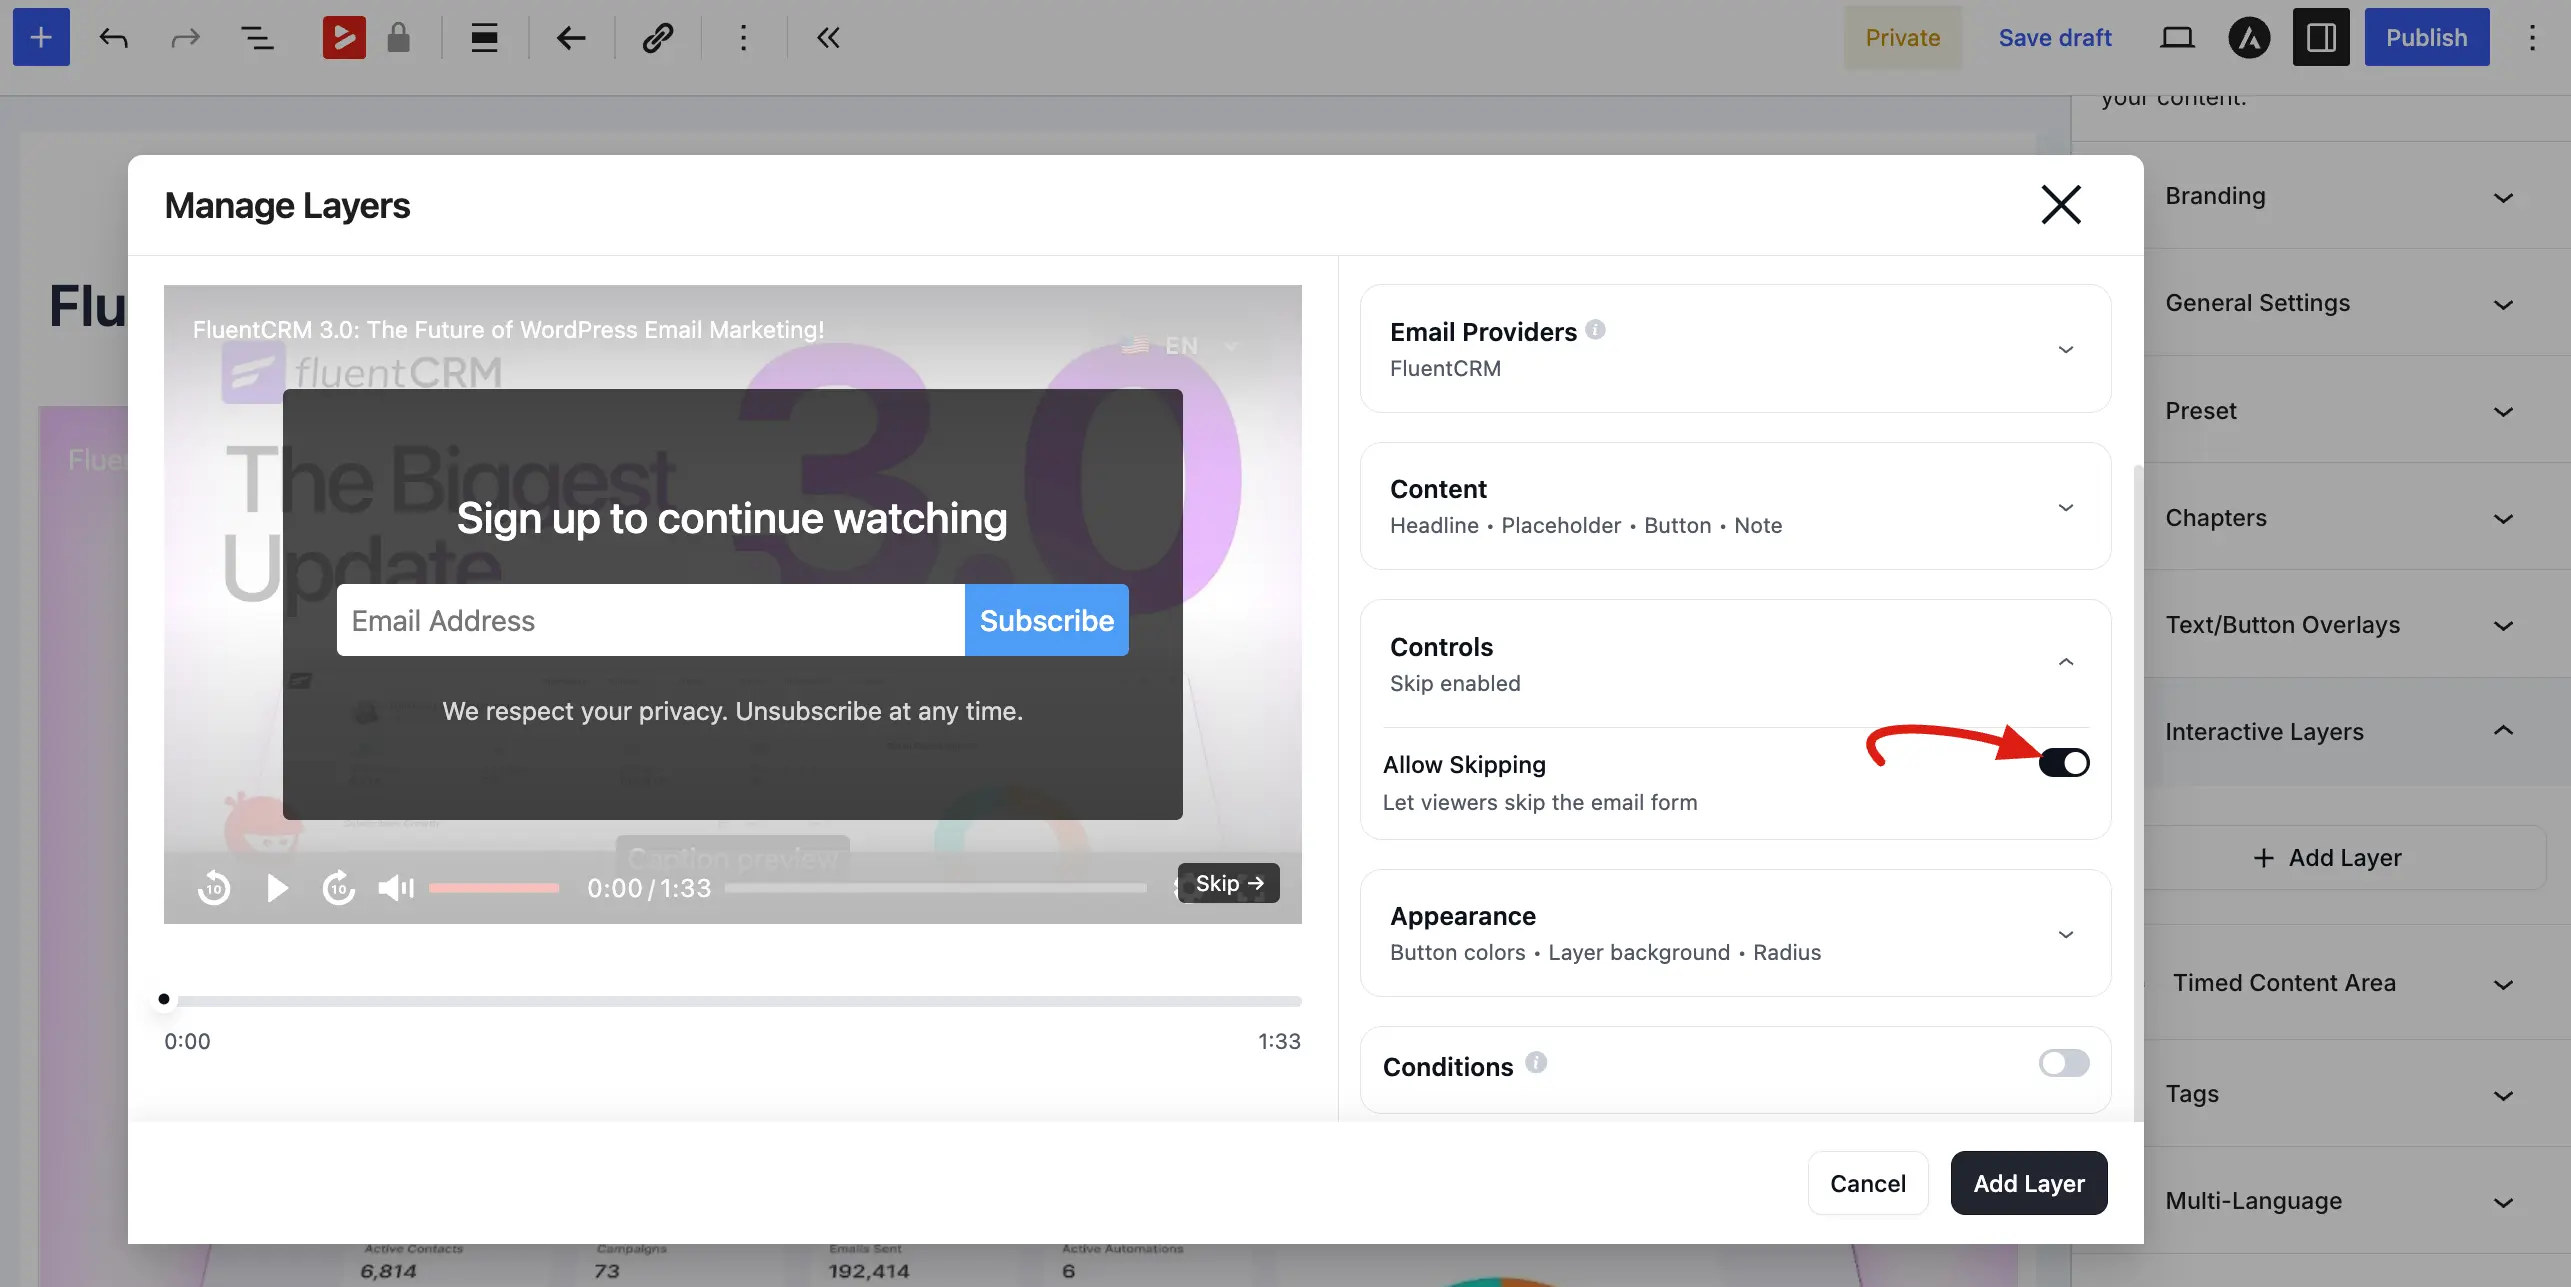
TIP
Setting Allow Skipping to Off creates a hard gate: viewers must submit their email to watch the rest of the video. Setting it to On makes the overlay a soft opt in. Hard gates collect more emails; soft gates create a better viewer experience. Choose based on your goal.
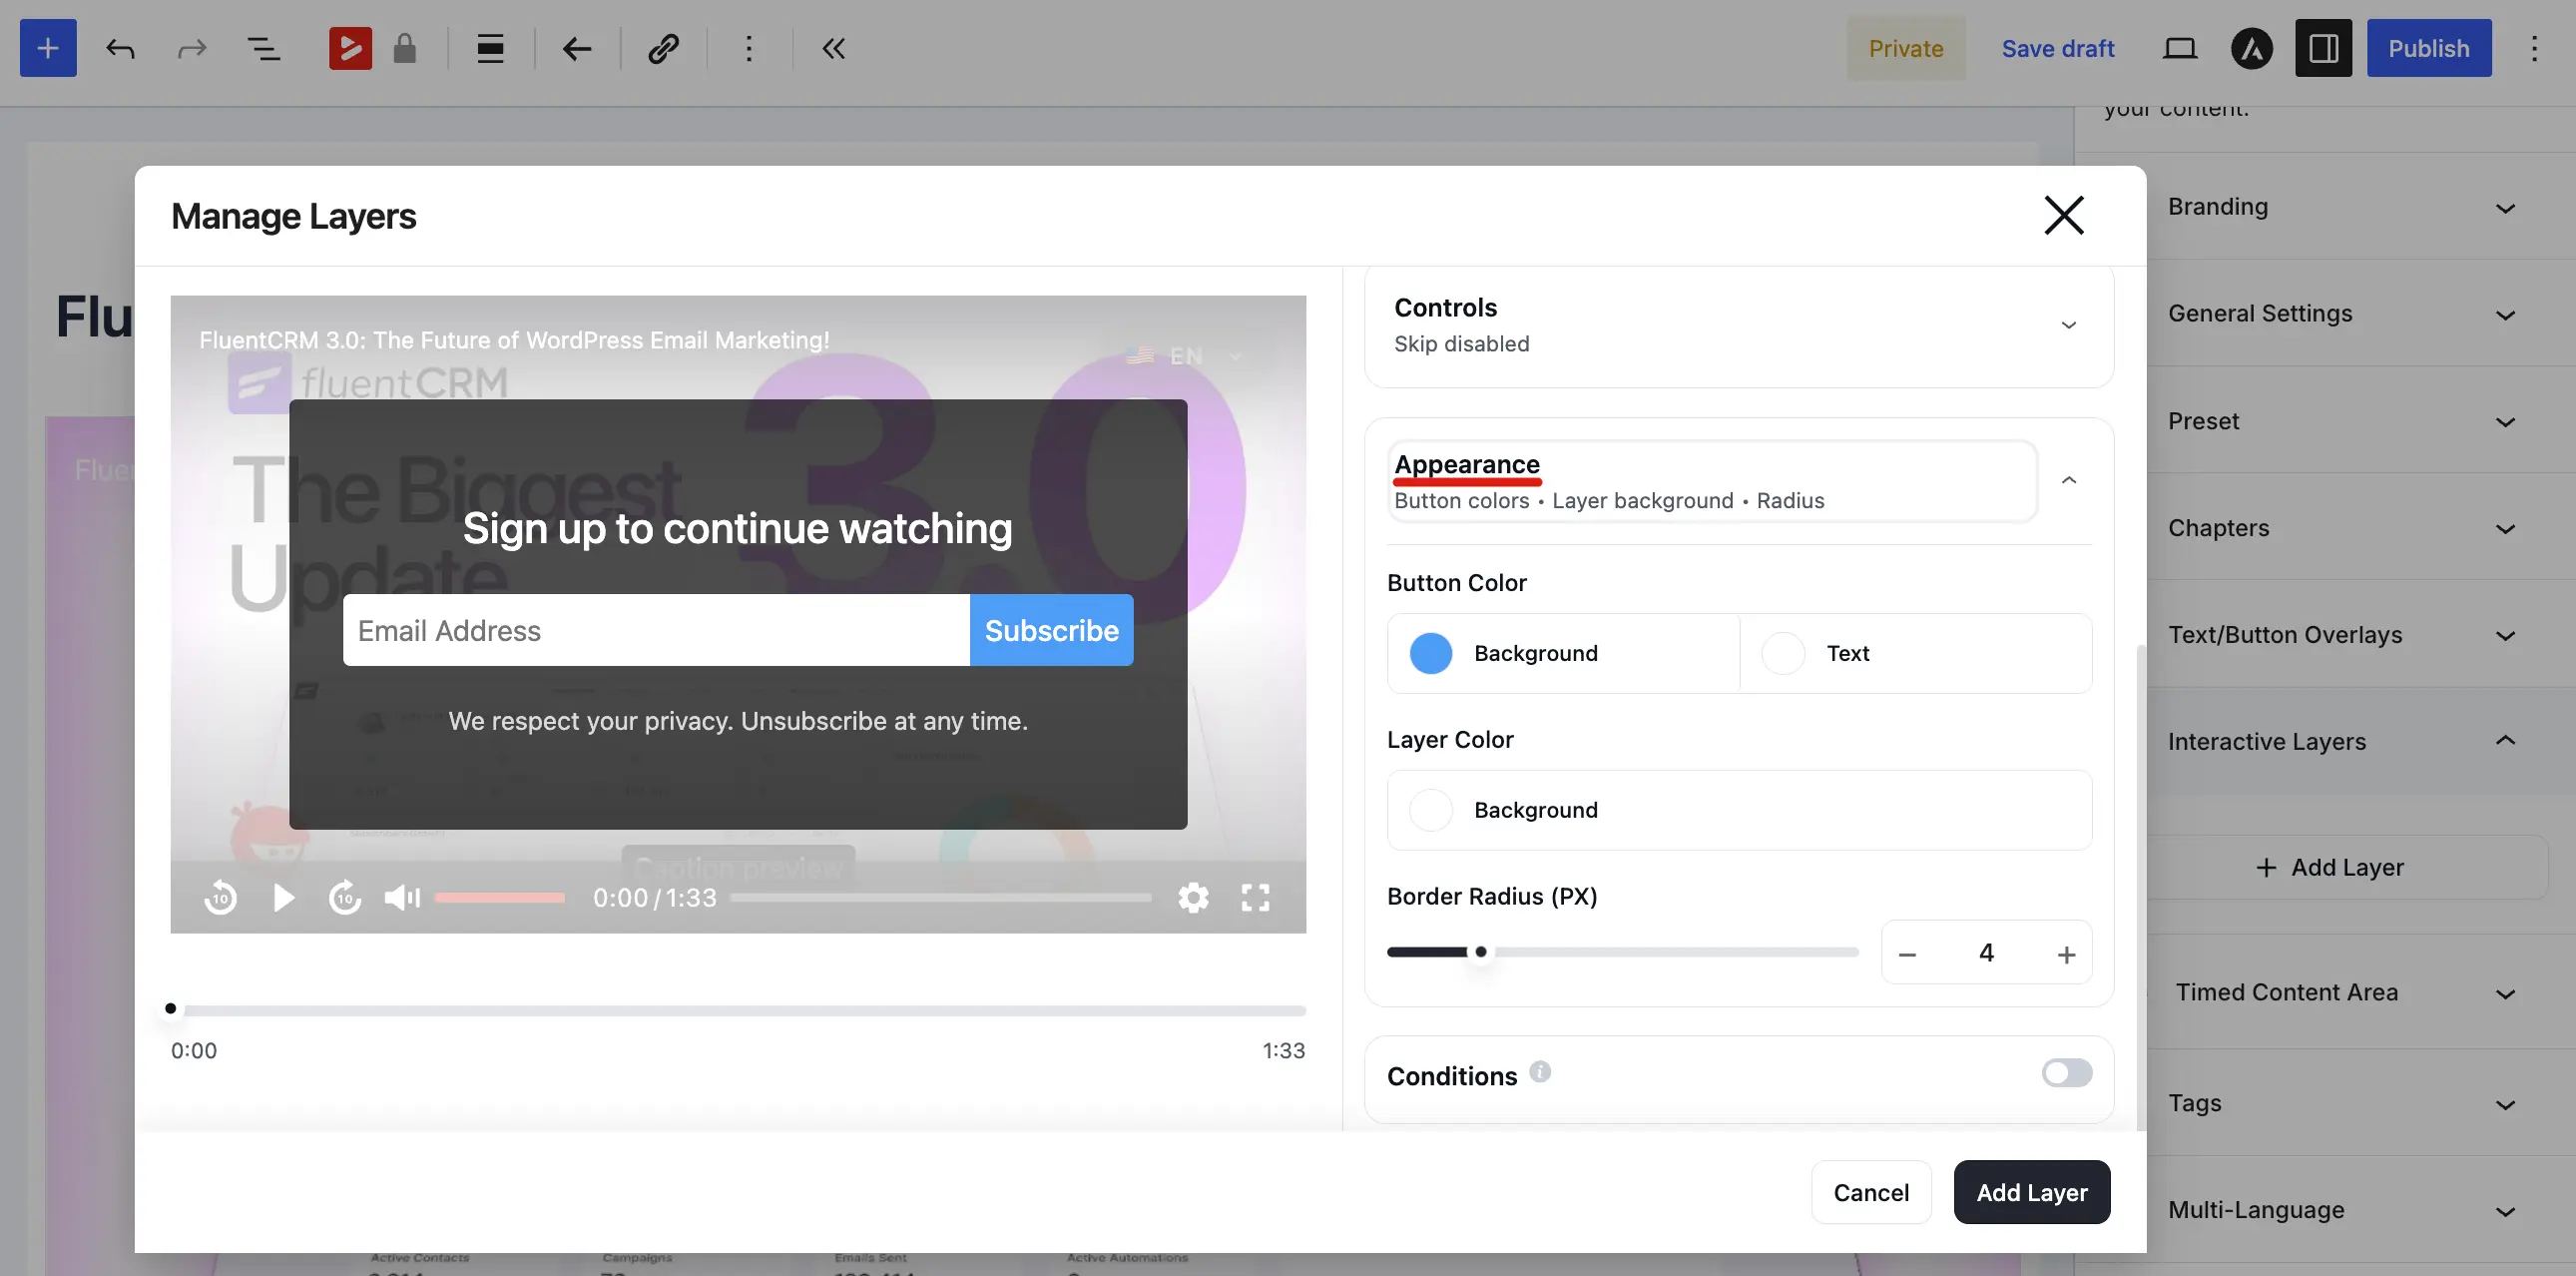
Appearance
The Appearance section styles the overlay and button.
- Button Color: Set the Background and Text colors for the submit button.
- Layer Color: Set the Background color of the overlay box.
- Border Radius (PX): Use the slider or input to control corner roundness for the overlay and button.
Conditions
The Conditions section lets you show the email capture layer only when specific rules are met.
- Toggle Conditions on.
- Choose Any (show if at least one rule matches) or All (show only if every rule matches).
- Add condition rows using the Field, Operator, and Value dropdowns. Examples include Viewer is logged in, Viewer is CRM contact, Viewer has CRM tag, and URL query parameter.
- Use + and − to add or remove condition rows.

Example: Gating a Webinar Replay
You recorded a 45 minute webinar and want to collect emails from anyone who watches past the first 2 minutes:
- Start Time:
0h 2m 0s - Allow Skipping: Off (viewers must enter their email to continue)
- Headline: "Enter your email to watch the full replay"
- Button Text: "Watch Now"
- Provider: FluentCRM, which adds them to your "Webinar Leads" list
Example: Soft Opt In on a Tutorial
You have a free tutorial and want to gently ask for emails without forcing it:
- Start Time:
0h 5m 0s(5 minutes into the video) - Allow Skipping: On (viewers can close the overlay and keep watching)
- Headline: "Enjoying this tutorial? Get more tips in your inbox."
- Button Text: "Subscribe"
Developer note
Submissions are handled via the fluent_player_email_submit AJAX action (works for both guests and logged in users). Developers can hook fluent_player/email_collection_hooks or use the fluent_player/pre_process_email_submit filter. See the documentation home for related guides; for custom code, refer to the plugin’s developer hooks in the source or your IDE.