Appearance
Adding and Editing Videos
This guide explains how to manage your video content within FluentPlayer. You can create, organize, and update your media directly from your WordPress dashboard without touching a single line of code.
Creating a New Media Item
Adding a video (Media) is the first step toward getting your content in front of your audience.
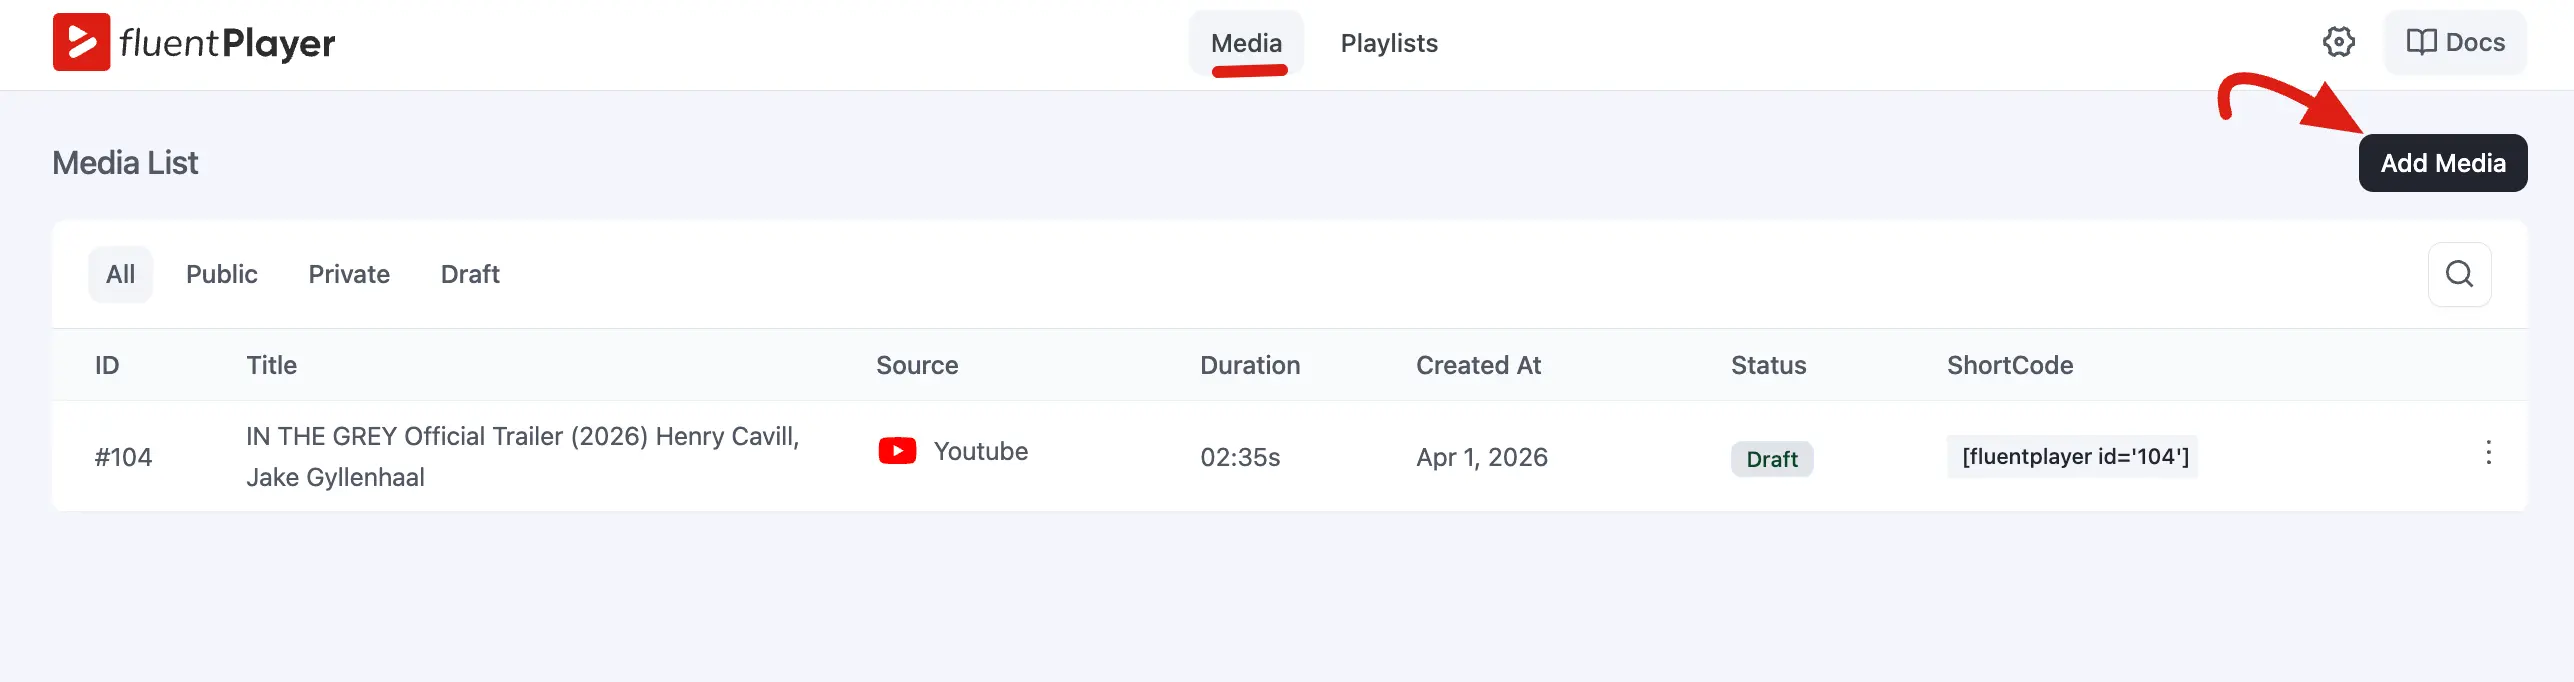
- In your WordPress admin, go to FluentPlayer → Media (the Media section in FluentPlayer Pro).
- Click Add Media (or Add New / +, depending on the screen) to create a new item.
- Give your media a title. This is for your reference in the admin and can also appear in the player header on the dedicated player URL.
Example: If you are adding a product demo video, you might title it "Product Demo: Getting Started."
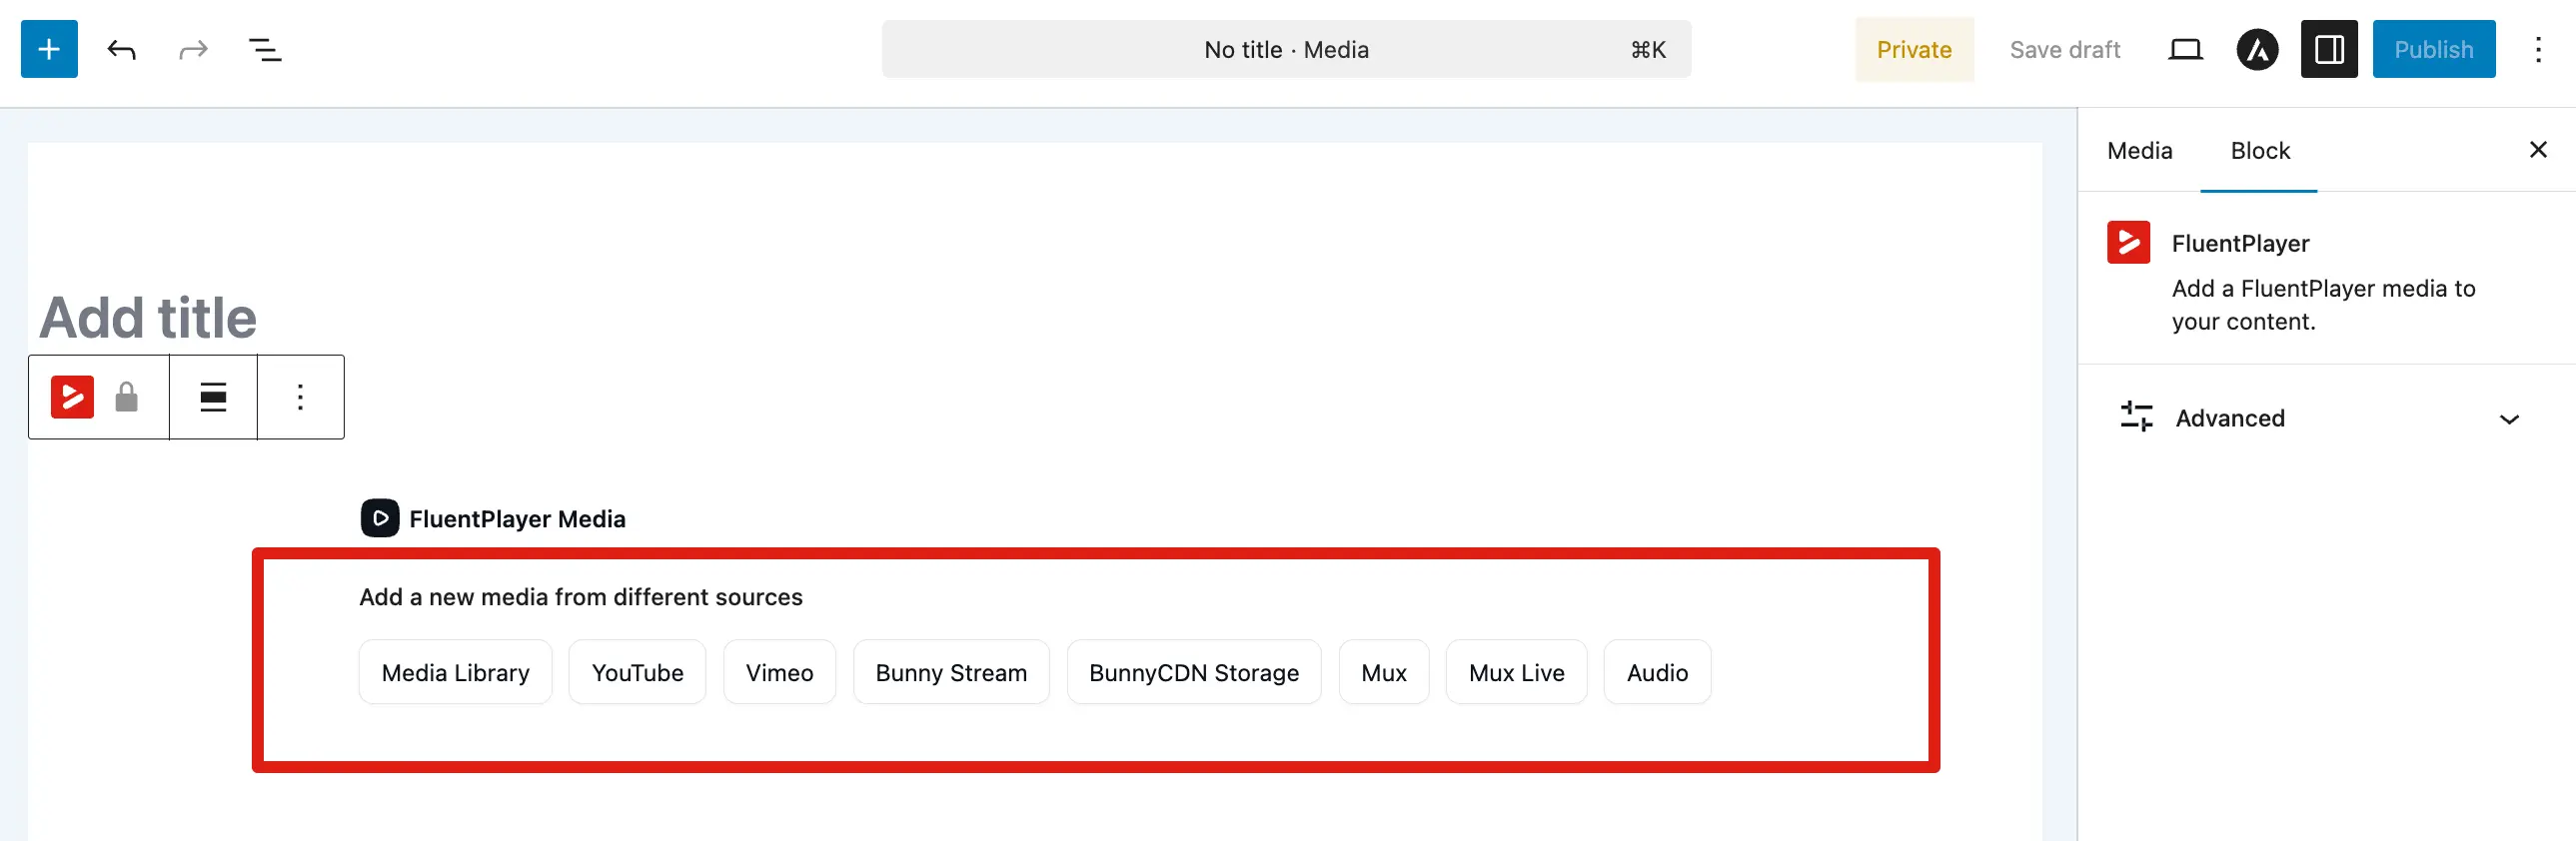
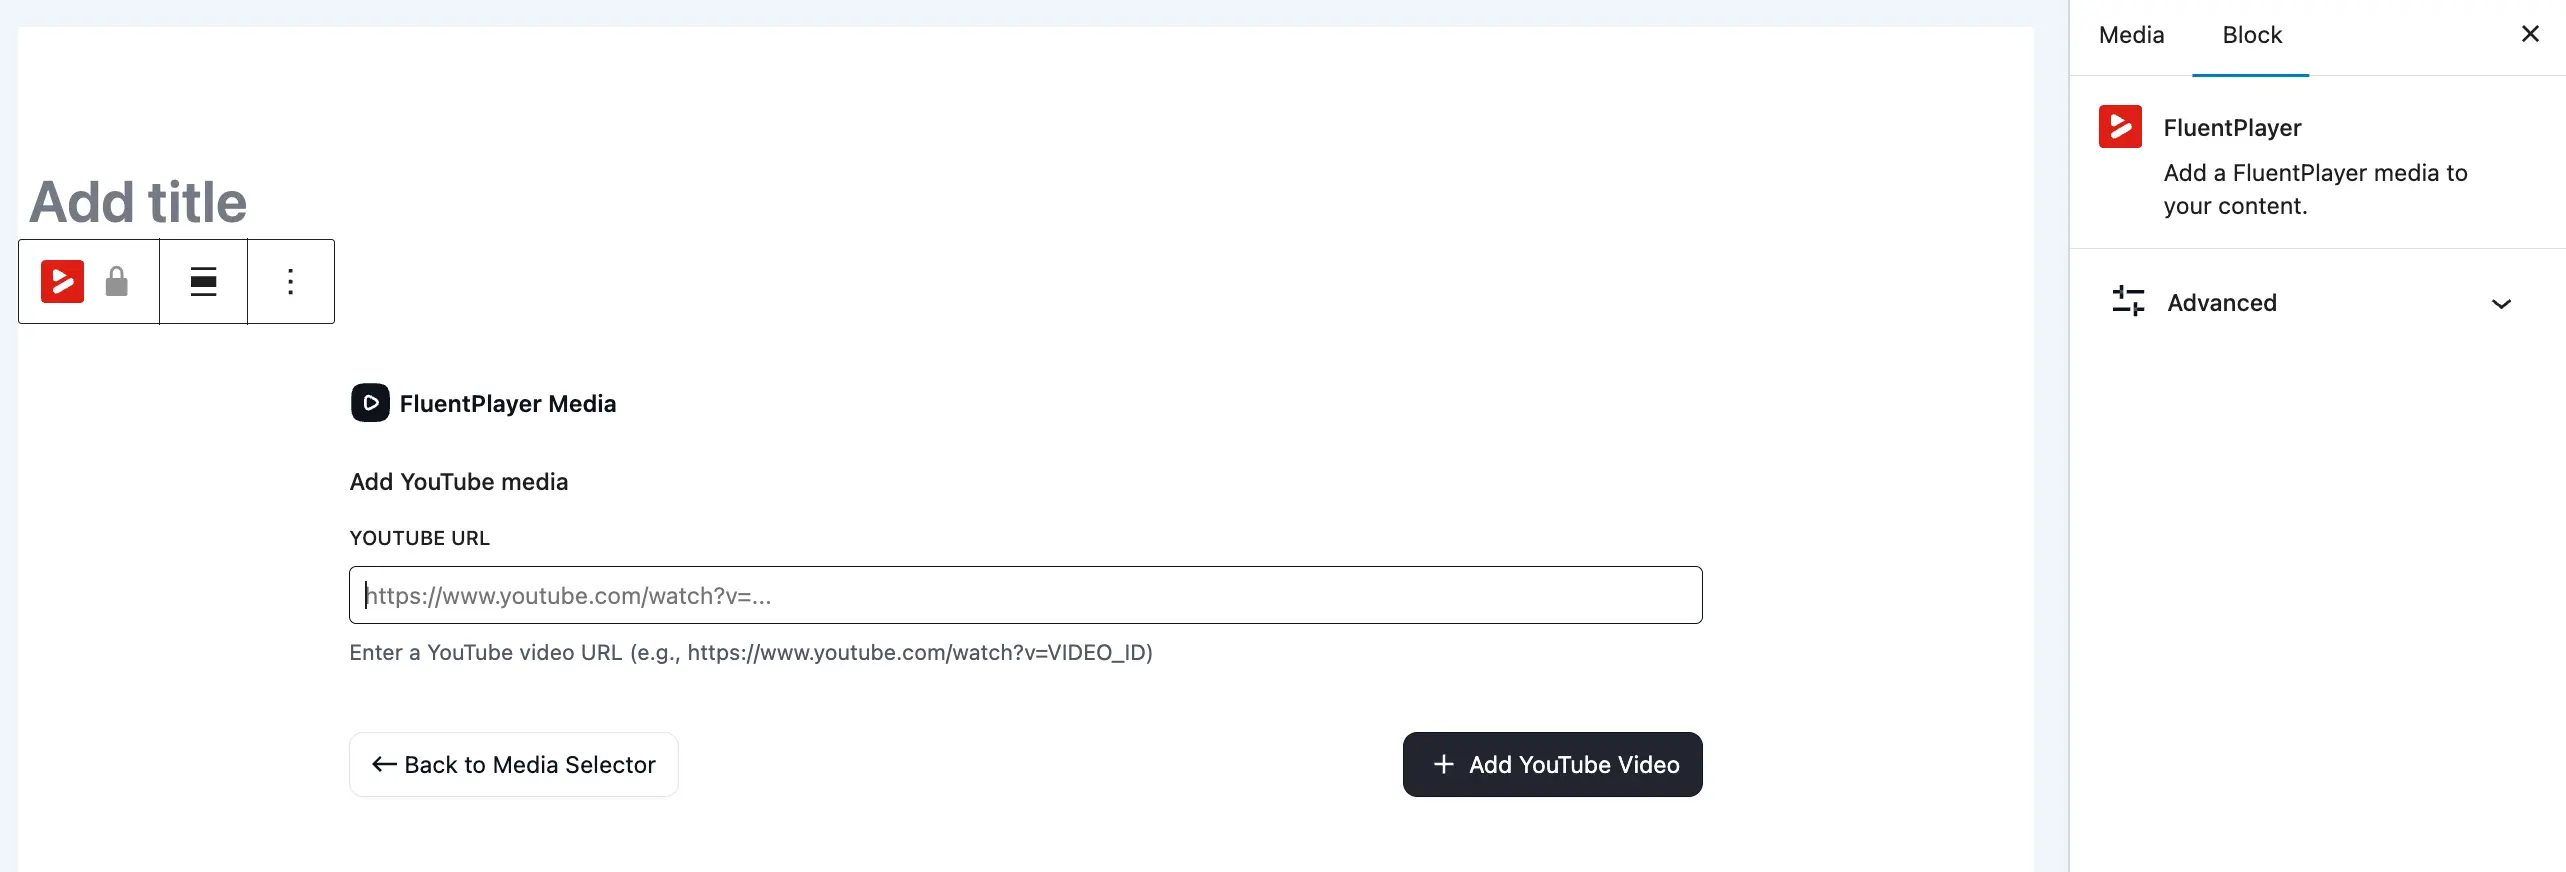
- Set the video source. This is the URL or file that the player will load. See Video Sources for all the options.
- Optionally, add a poster image. This is the thumbnail that viewers see before they click play. A good poster makes your video look more professional and inviting.
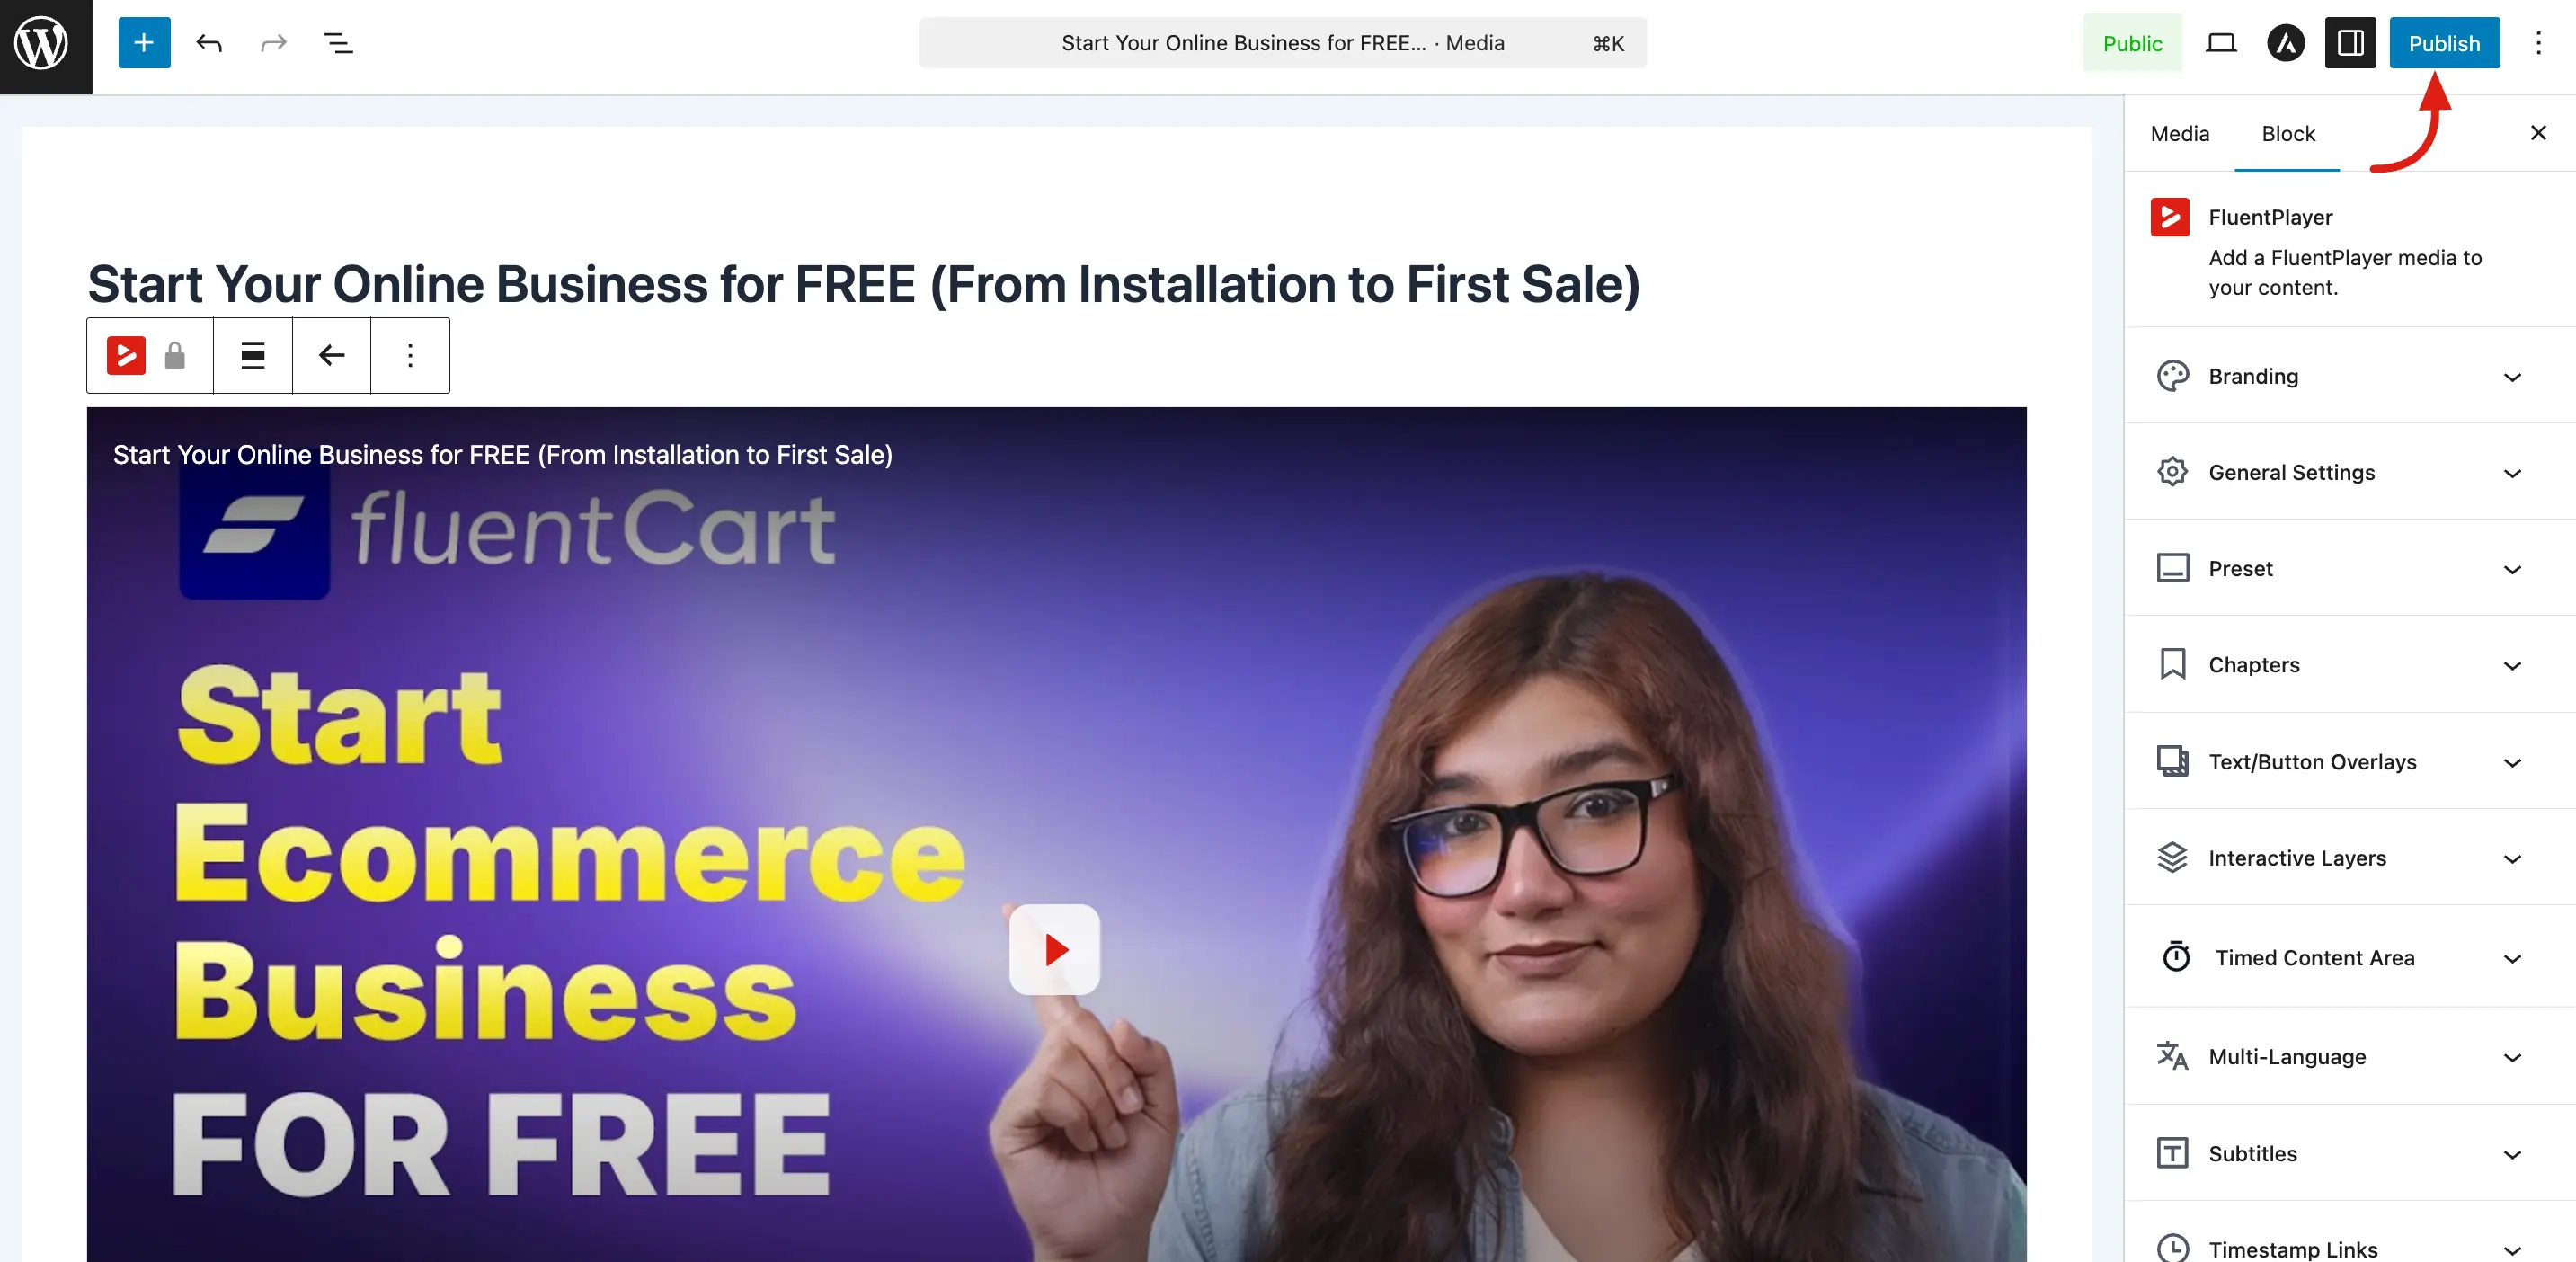
- Choose a preset that controls the player's look and controls. See Presets for details.
- Click Publish to make it live, or Save as Draft to come back later.
TIP
You do not need to configure everything at once. You can always come back and change the video source, poster, preset, or any other setting later.
Editing an Existing Media Item
You can update your videos at any time, and the changes will automatically reflect everywhere the video is embedded on your site.
- Go to FluentPlayer → Media.
- Find the media in the list and click on its title to open the editor.
- Modify any settings, including:
- Click Update (or Publish) to save your changes.
Understanding the Media Editor
The media editor is organized into logical sections to help you find settings quickly:
- Source Section: Manage the video URL or professional hosting connections like Mux or Bunny.
- Poster & Preset: Control the thumbnail and the visual template of the player.
- Overlays: Configure engagement tools like email capture and CTA buttons.
- Timed Content (Pro): Add text, lists, or buttons that appear below the player at specific timestamps.
- Advanced Settings: Manage subtitles, multi language tracks, and custom CSS.
On the media list screen, use the status filters to narrow the list:
| Filter | What it shows |
|---|---|
| All | Every media item regardless of status. |
| Public | Items published and visible according to your visibility rules. |
| Private | Items restricted to authorized viewers (when your workflow uses private publishing). |
| Draft | Items not yet published. Good for work in progress. |
Beyond status, you can also narrow the list by:
- Provider — the video source type (WordPress, YouTube, Vimeo, Mux, Bunny Stream, Bunny Storage).
- Media type — audio or video.
- Tag — any media tag you have assigned (Pro).
Search still works across titles and IDs as supported by your version.
Finding the Media ID
Every media item has a unique ID (a number). You need this ID when embedding the video with a shortcode like [fluentplayer id="42"] (or [fluentmedia id="42"]).
Here is how to find it:
- In the Media list, the ID is shown next to each item (for example,
#42). - When editing a media, check the URL in your browser. It usually contains something like
post=42.